
I know that we’ve started on some more advanced (intermediate) astrophotography, but I ran across some photos from last year and realized that there’s another simple astronomical object that can be easily photographed.
The sun!
Unlike the moon, constellations, aurora (which I’ve never seen in person but would kill to get to see and photograph!), and satellites, photographing the sun has the potential to be dangerous. It goes without saying, but I’ll say it anyway: DO NOT LOOK AT THE SUN THROUGH YOUR CAMERA! ESPECIALLY DO NOT LOOK AT THE SUN THROUGH A TELEPHOTO LENS!! EVER!! NOT EVEN ONCE!!! YOU’LL SERIOUSLY DAMAGE YOUR EYES AND POSSIBLY GO BLIND!! (Not that other kind of “you’ll go blind” either, this is the real thing, physics and science and all of that, not moral guilt and BS and bullying.)
That doesn’t mean that you can’t take photos. You just need to be clever.
First, you need to block out about 99% of the light from the sun. It’s possible to do this with a fancy solar filter and in fact you can get such filters for telescopes like my 5″ Meade ETX-125EC, but they’re expensive. I’m still talking “simple” here.
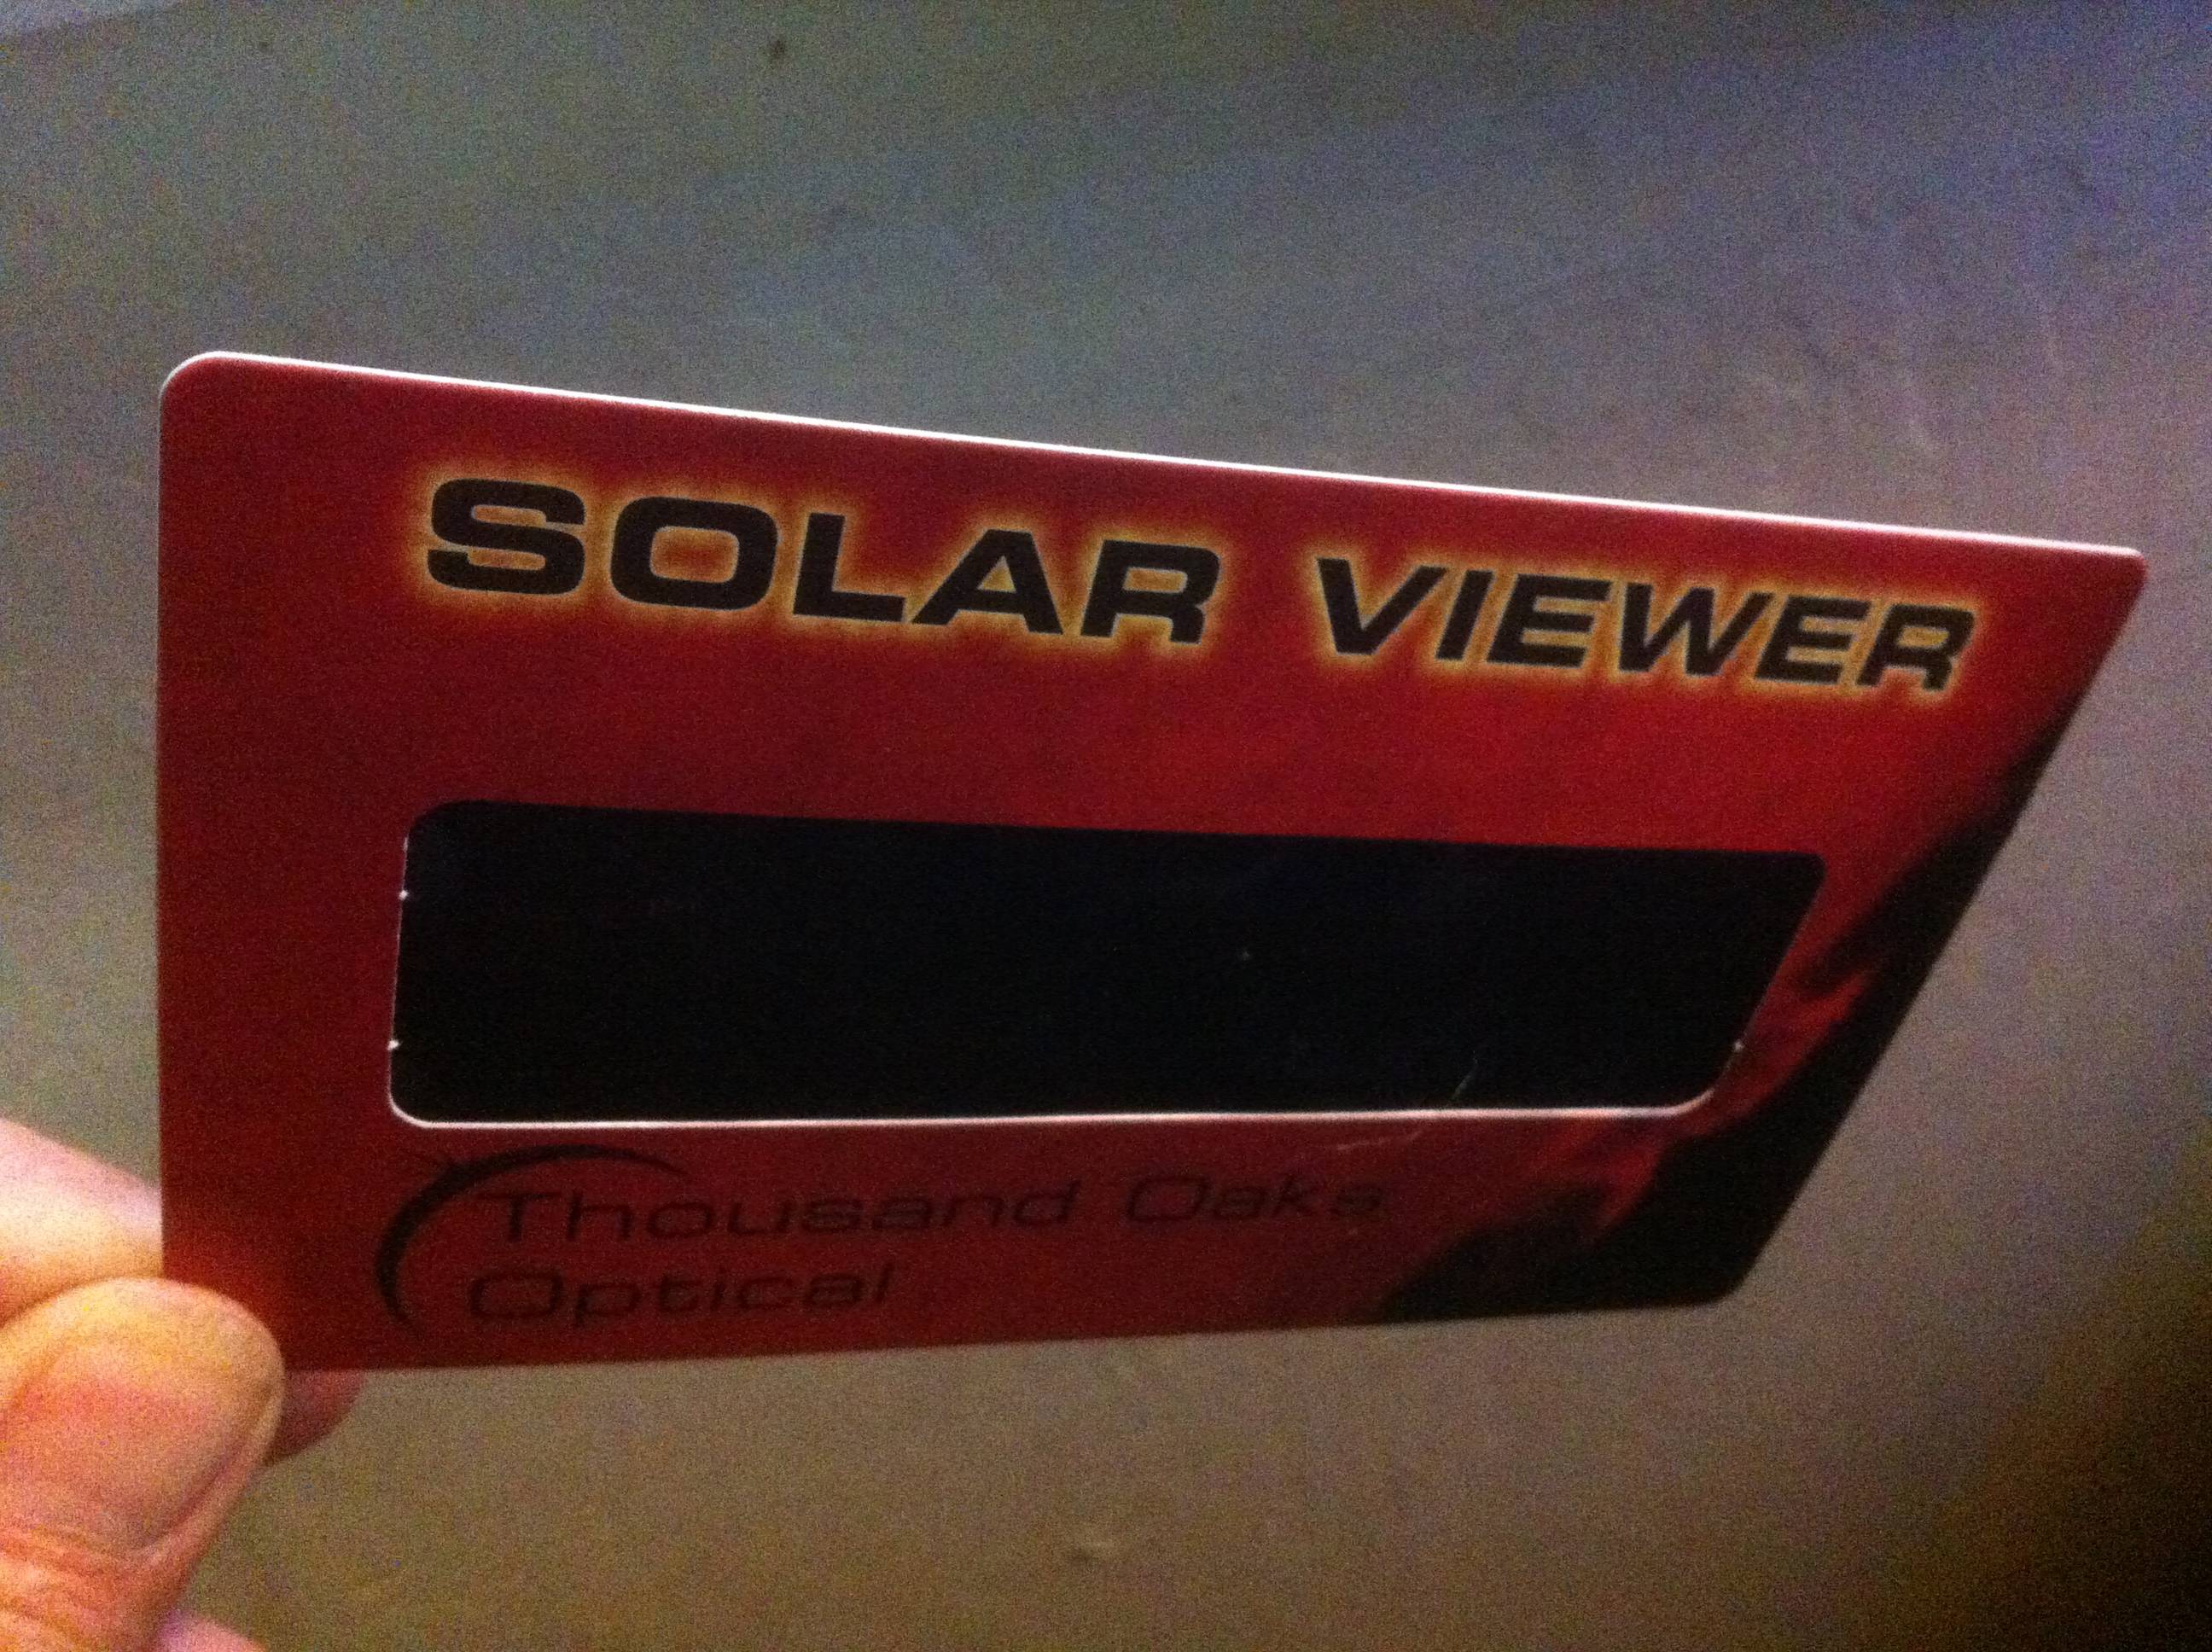
You can get one of these from any astronomy or telescope store for about $1. (If you wait until the day before an eclipse or the day of an eclipse, it might be $10 – if you know what I mean.) Coincidentally, it’s just about the perfect size to cover the front end on my 70mm-300mm Tamron zoom lens. I simply taped it on with a couple tiny tabs of duct tape.
Make sure that it completely covers the lens – even the tiniest bit of stray full-intensity sunlight will ruin your day and possibly your camera.
To aim at the sun, put your camera on a tripod. Point the lens (covered with your cardboard and mylar “Solar Viewer”) at the sun.
I’ll repeat one more time: DO NOT LOOK THROUGH YOUR CAMERA AT THE SUN, EVEN IF YOU HAVE YOUR $1 SHIELD COVERING THE LENS! EVEN IF YOU THINK IT’S OK, IT’S NOT. YOU’RE STILL GETTING MAGNIFIED AND FOCUSED UV LIGHT SHOT STRAIGHT INTO YOUR EYEBALL. OH, AND DID I MENTION — YOU’LL GO BLIND!!
If you have one of the newer DSLR’s that actually shows an image on the back like an iPhone or camcorder does, this is a piece of cake. While you shouldn’t ever look through the lens at the sun, looking at an LCD display on the back of the camera is completely safe. Just “eyeball” your pointing, then refine it by looking at the LCD display.
If you have an older DSLR (like I do) where it only uses the LCD display on the back to show you the picture after you take it, aiming is a bit trickier, but still pretty easy. “Eyeball” your pointing, then look behind you at your shadow. If you can see the shadow of the lens, you’re still not pointing in the right direction. Move the tripod until you minimize the size of the camera’s shadow, meaning that you have it “square” to the sun. Shoot a picture and then look at the result on your LCD display – adjust accordingly. Easy peasy!
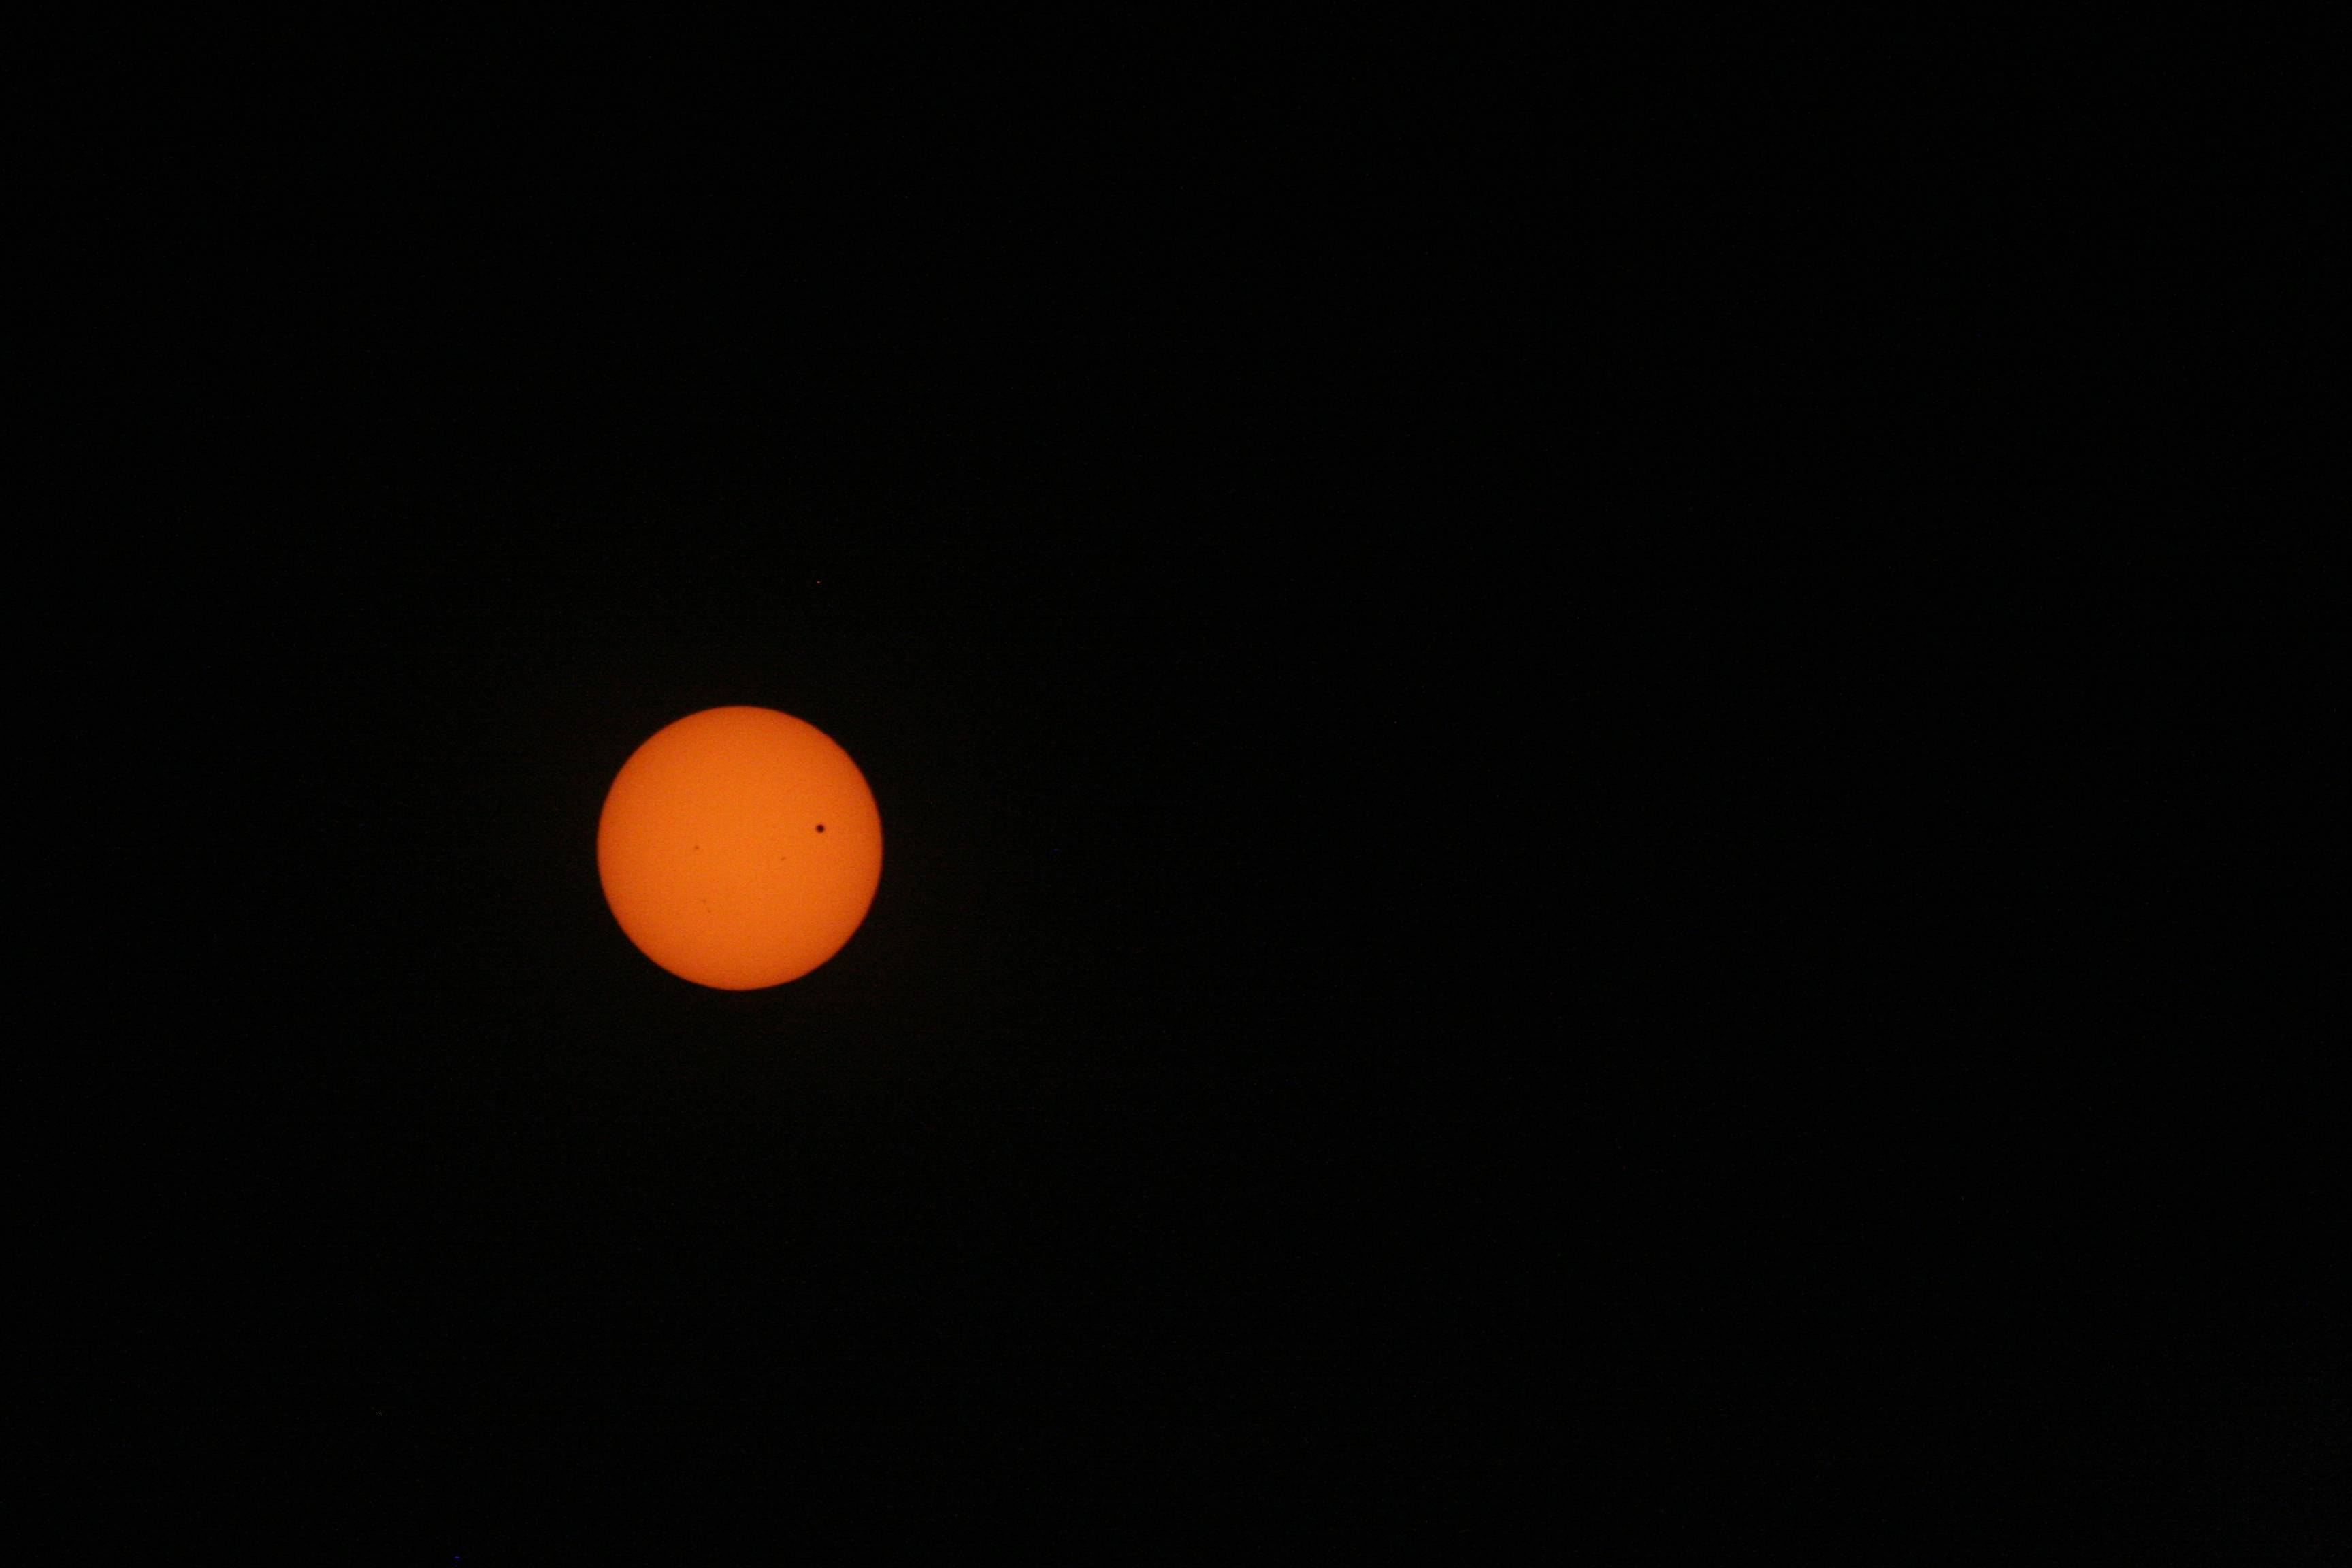
The mylar solar filter will make the sun’s image look very orange. No worries. As for the size of the sun’s image in the frame, it will be EXACTLY as big as the moon’s image is from when we were playing around with taking pictures of it with the same lens and camera.
This makes perfect sense if you think about it – what happens during a full solar eclipse? The moon passes directly in front of the sun and we see the solar corona because the angular size of the moon and sun are exactly the same. Right? (Yeah, yeah, annular eclipses, blah, blah, blah. Close enough for government work!)
So does it work?
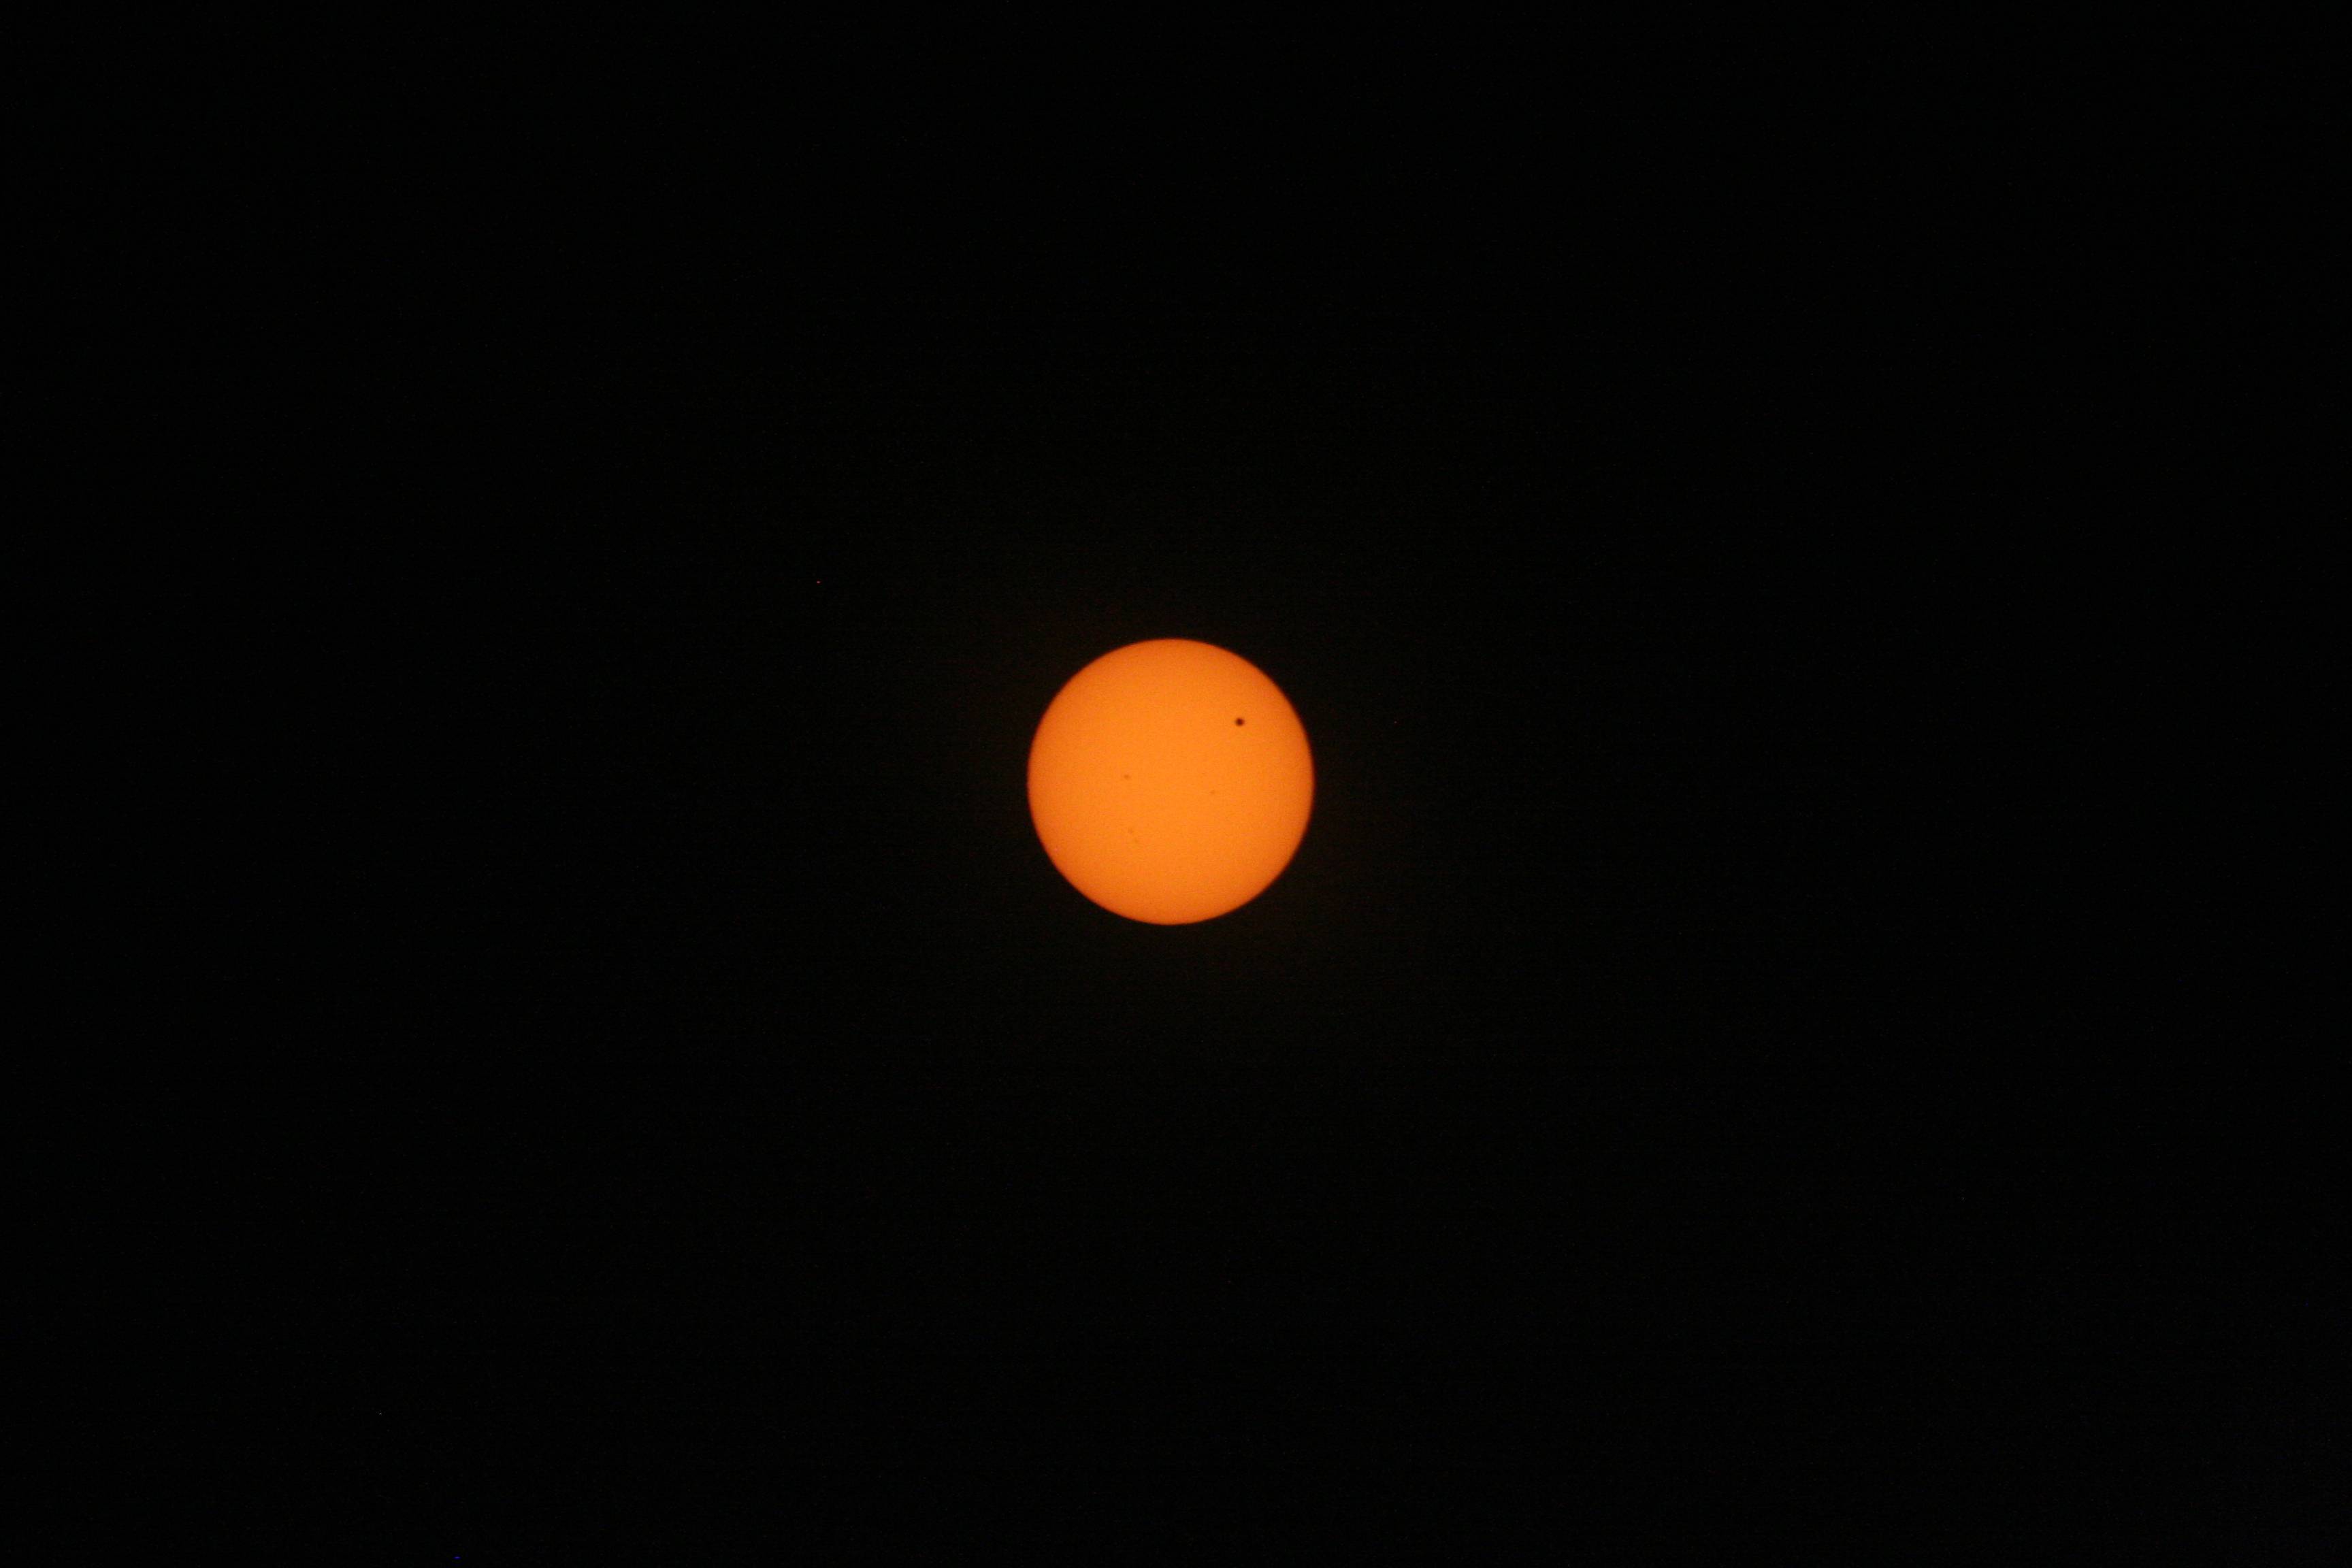
Yes! Yes it does. These pictures were taken on June 5, 2012 when a very rare event, a transit of Venus, occurred. How rare? Transits of Venus occur in pairs eight years apart, and this was the second one of the pair that occurred in 2004 and 2012. The previous pair were in 1874 and 1882, while the next pair will be in 2117 and 2125.
That rare.
So, that black dot that you see at about the two o’clock position? That’s the planet Venus silhouetted against the face of the sun.
Of course, it’s moving. It can take hours to cross the face of the sun. From Los Angeles I took pictures from about 17:20 to 19:25, at which point the sun was setting. Then, to prove that it really was moving (I don’t think NASA really needed my proof, but it’s a nice little exercise to do anyway.) I took five frames covering that 2:05 period and put them together using Photoshop.
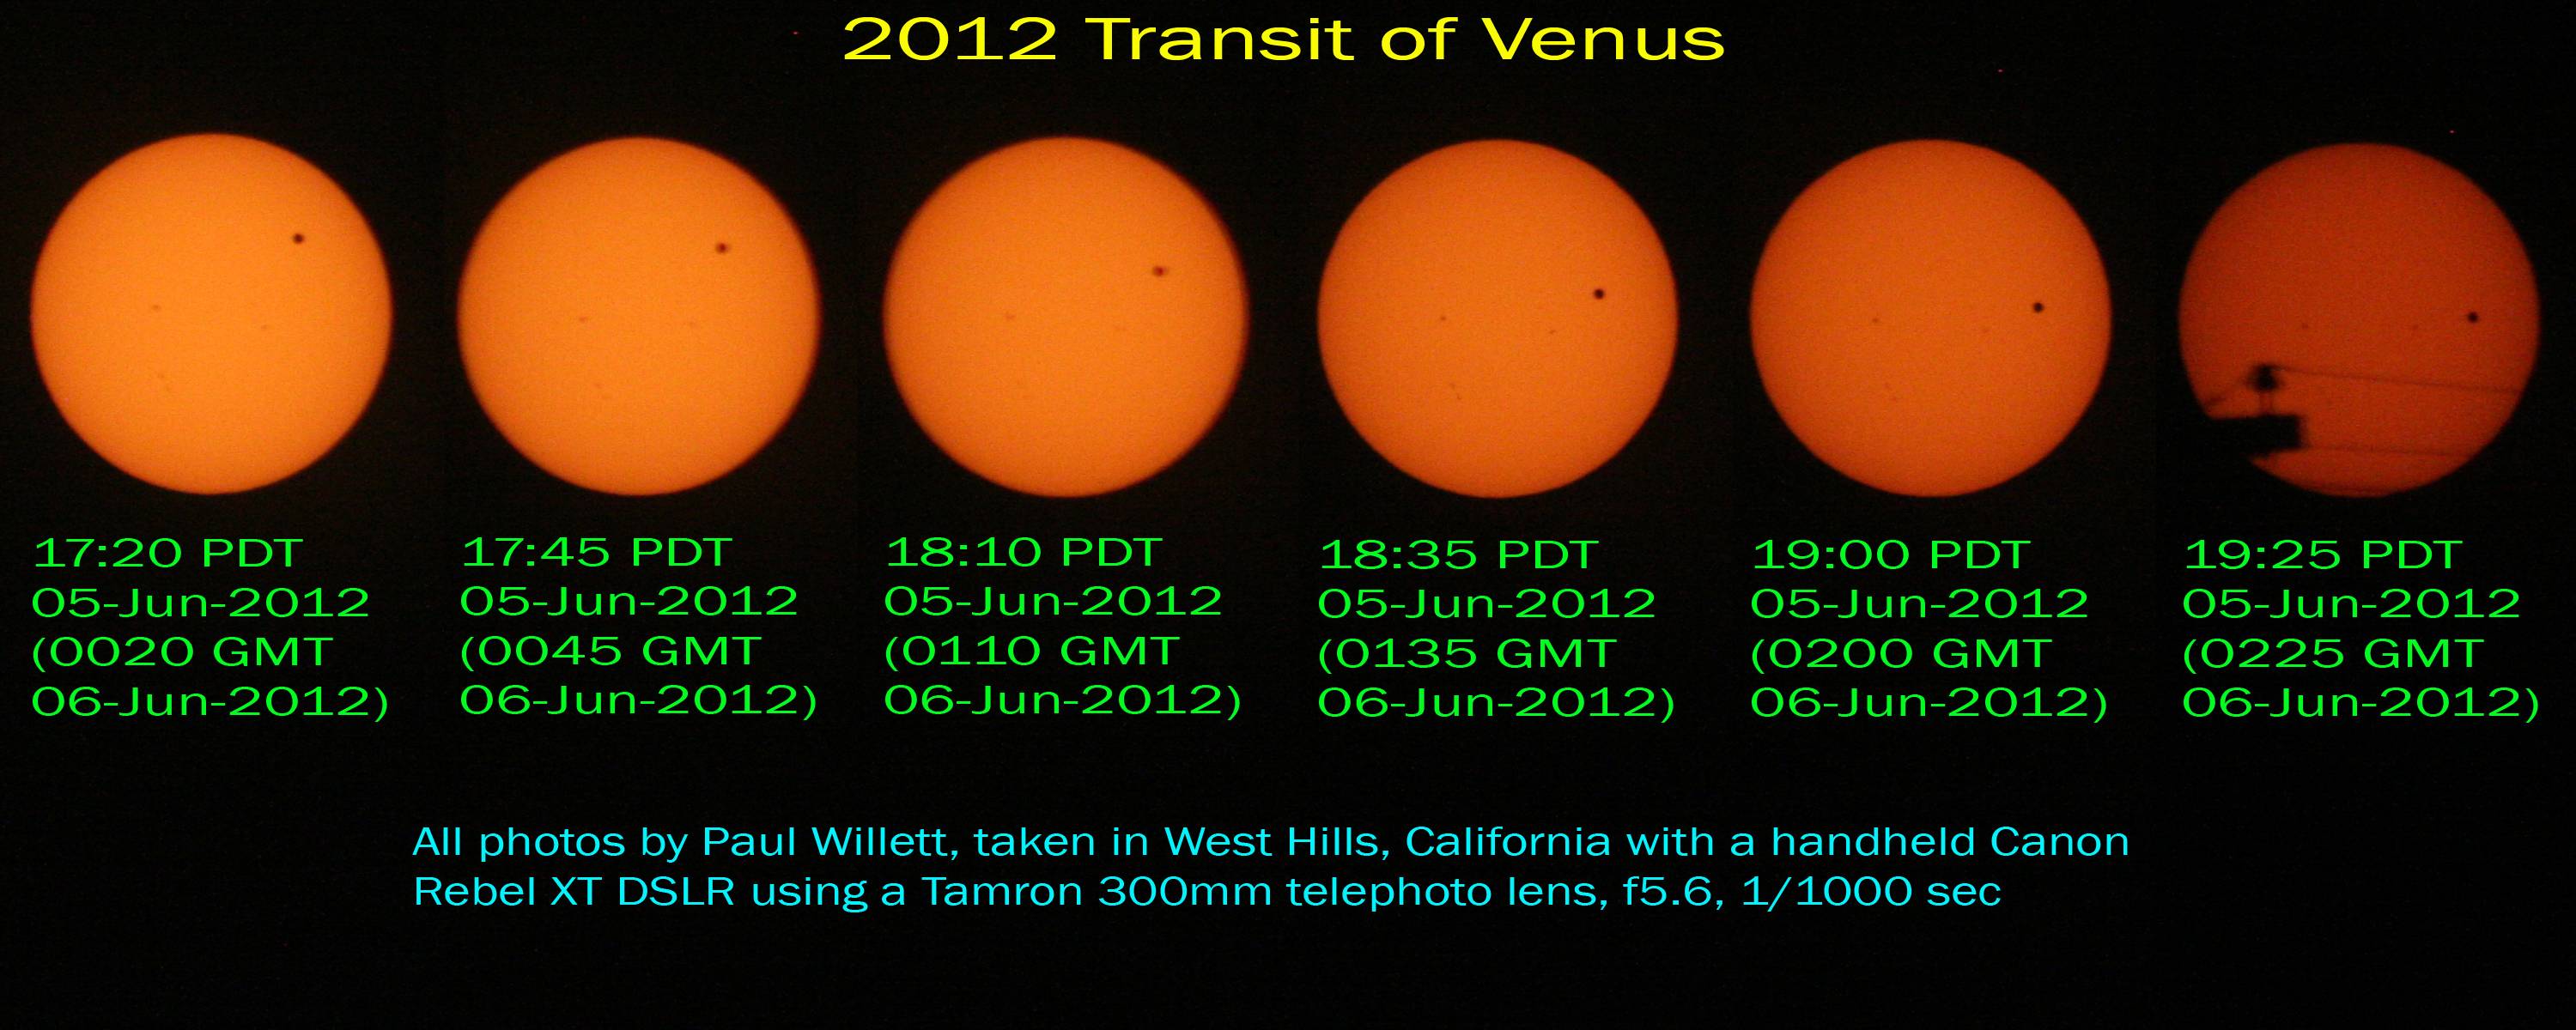
All with my off-the-shelf camera, tripod, telephoto lens, a $1 mylar card (OK, it was $5 ’cause I waited until that morning) and a little bit of caution and cleverness.
POP QUIZ: What should you never, EVER do because it really, REALLY will make you go blind?
Very good. You get ice cream.
I need to go find some aurora some day.

Pingback: Juicy Chunks O’ Wisdom For ____day, October __th | We Love The Stars Too Fondly