
Enough about me – what about the universe?
I’ve been an amateur astronomer since I was a teenager and I’ve been trying to take decent pictures of the heavens about as long. In the early 1970’s this was an expensive hobby. Due to the relatively high costs involved with film photography, it paid to have a pretty good idea of what you were doing before taking a picture. But the only way to know what you were doing was to take lots of pictures, so it helped to have a couple of paper routes to feed the need for photons on film.
Long before the days of digital cameras, using film had its own challenges for astrophotography aside from the relative cost. Commercial processing of film was (and is) mostly automated, and with deep sky astrophotography you’re turning in film that’s about 99% black with thousands of pinpoint bright spots. The automated systems tend to freak out and think that you’ve sent them a roll of unexposed film by mistake. I got more than one roll returned to me with that notation attached. So I learned early to do my own black & white processing (if you want it done right, or more importantly, if you want to really screw it up with style…) and to find smaller processing firms that would do “custom” color processing to get it done correctly.
These days you can do amazing things with digital cameras, even more so if you’ve got a decent DSLR like a Canon or a Nikon. To take the really outstanding photos like you see in Astronomy or Sky & Telescope you’ll probably need additional equipment, but there are some truly amazing pictures that you can take with nothing more than some pretty common photography gear that you may already have.
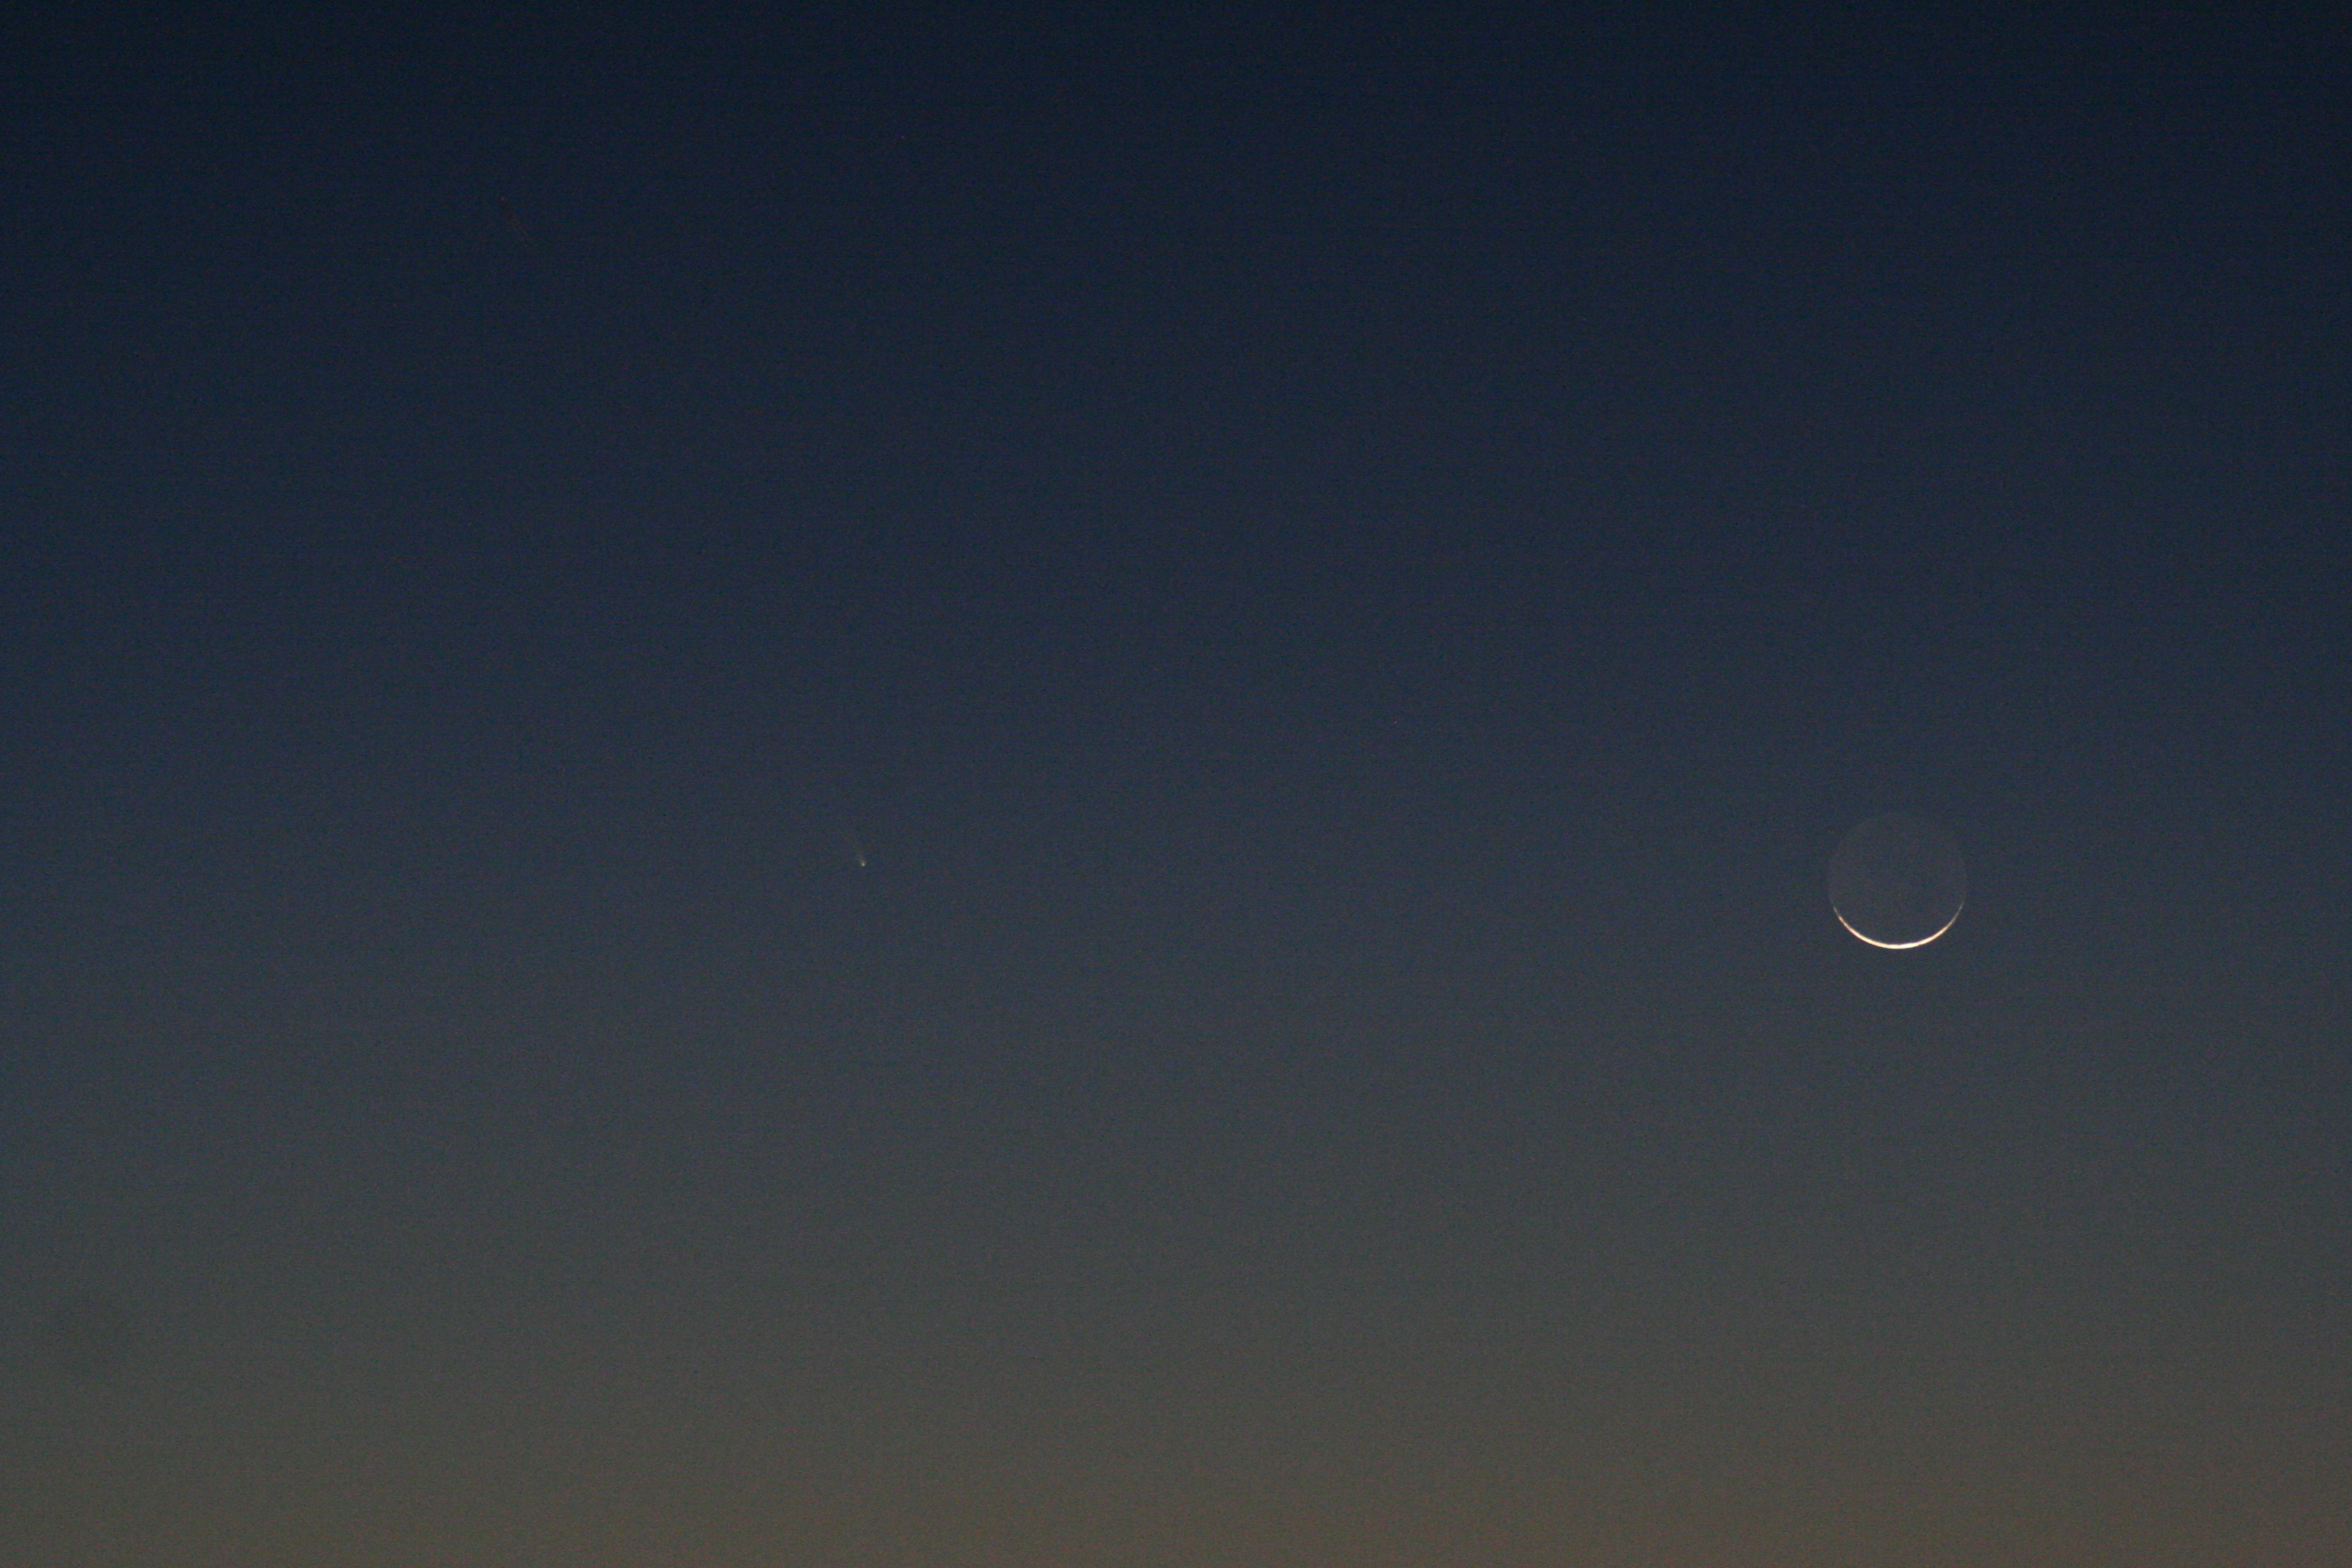
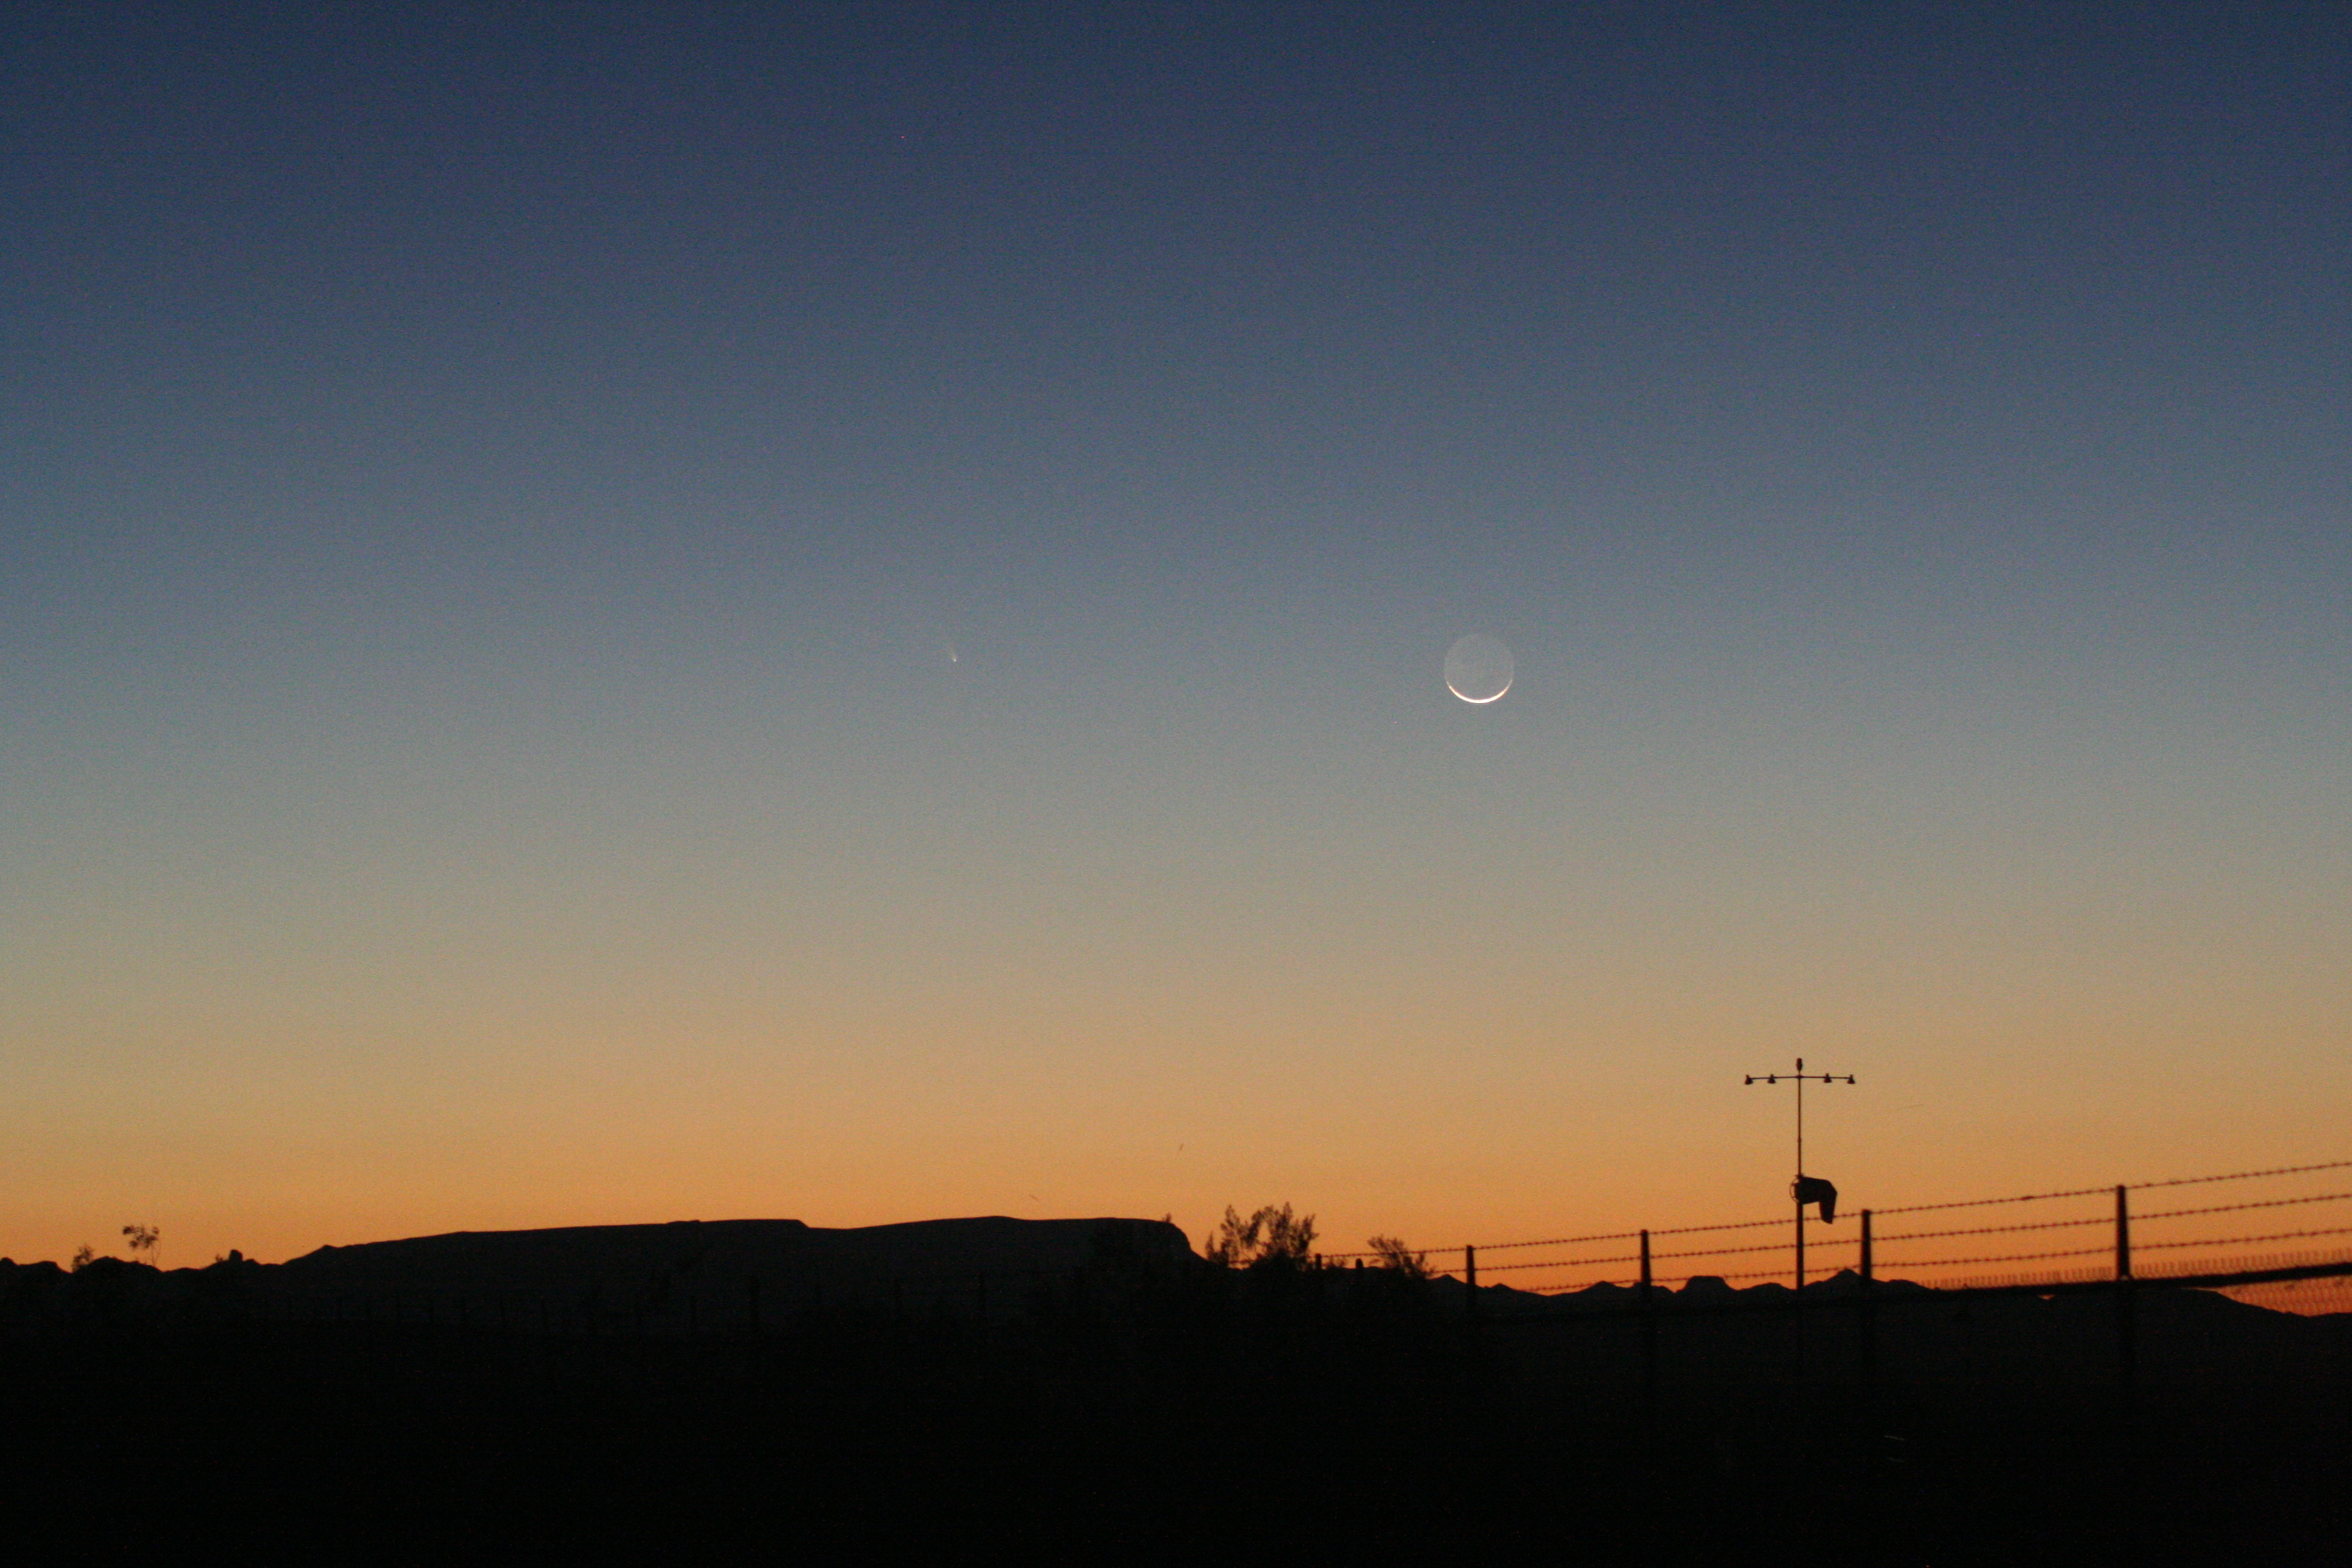
For example, the header photo for this blog was cropped from this picture:
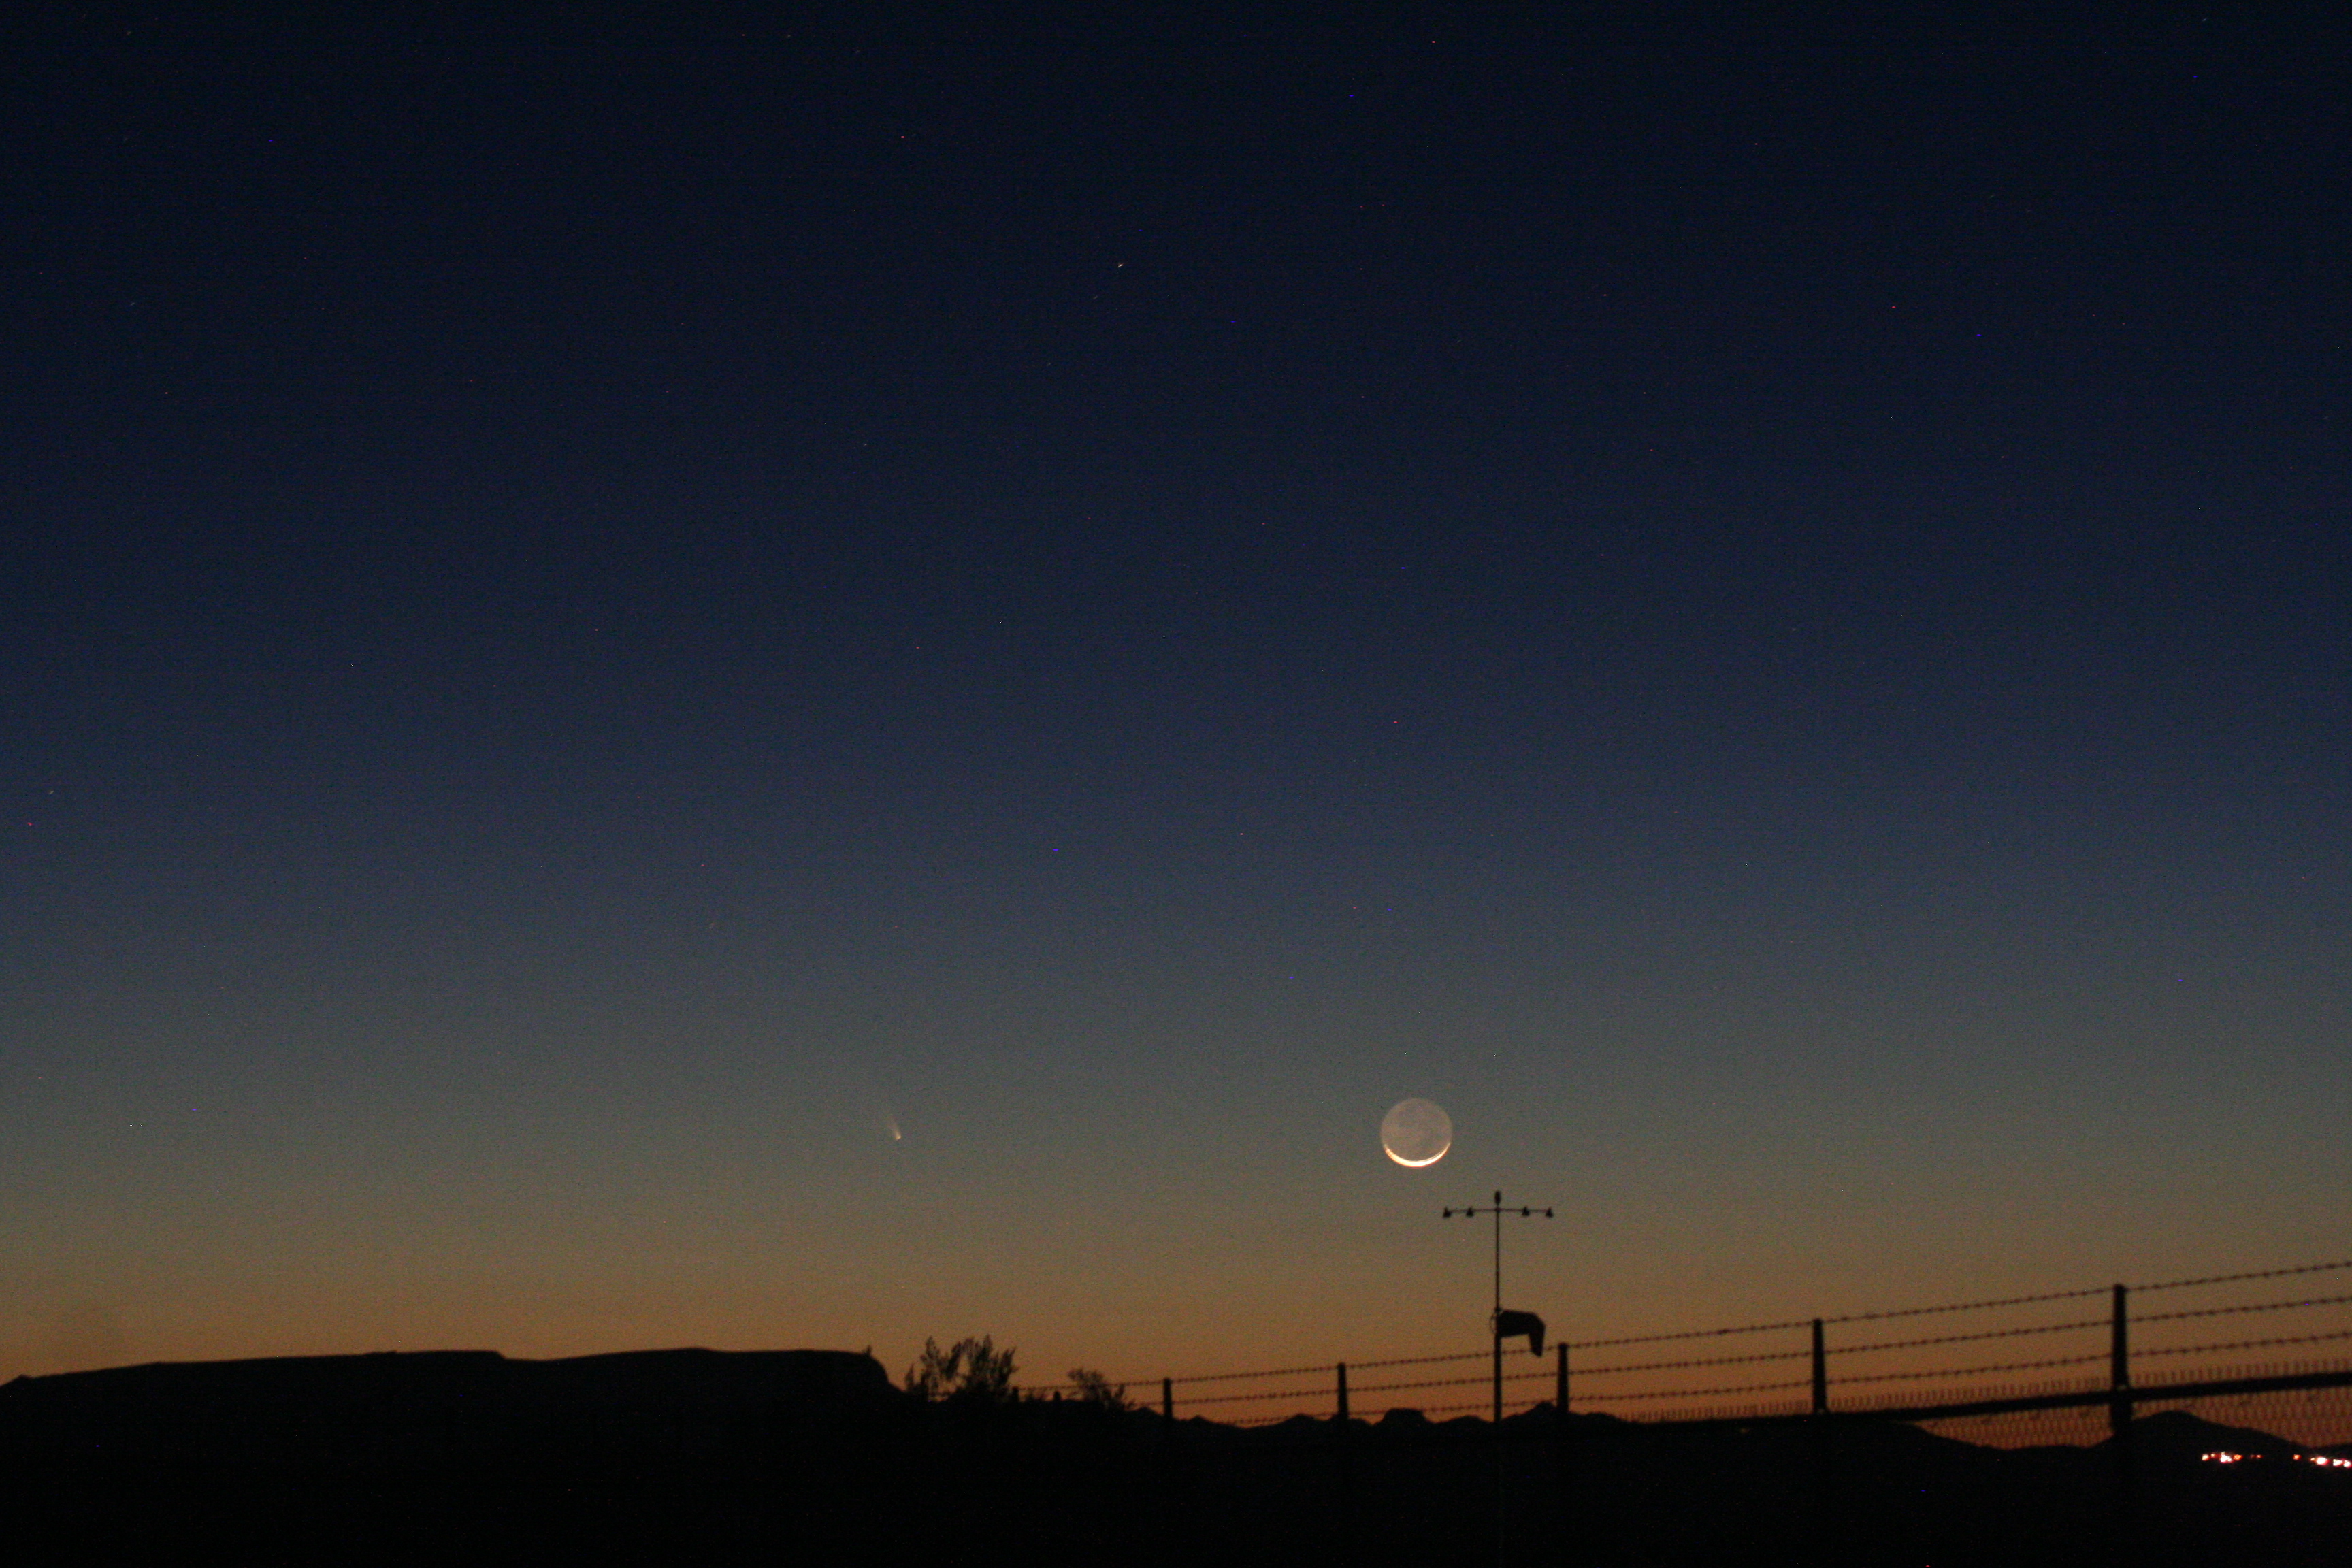
This picture was taken March 12, 2013 at 19:39 PST using a tripod-mounted Canon Eos Digitial Rebel Xt and a Tamron 70-300 mm zoom lens set at 70mm, manually focused. The exposure was 2.5 seconds at f5.6. The moon was just over one day after new moon and nicely shows the “old moon in the new moon’s arms” effect, with the majority of the lunar surface illuminated by light reflected off of the Earth but the lower limb of the moon much more brightly lit by direct sunlight. To the left of the moon, level with it about six lunar diameters out, you can see Comet Pan-STARRS at nearly it’s brightest for northern hemisphere viewers.
This picture was taken from a spot out in the Arizona desert off of I-10, about 100 miles west of Phoenix. We had planned to stop just before sunset at a rest stop but found the rest stop to be closed (stupid budget cuts!) and ended up just bailing off the interstate at the next exit and finding a spot off of a dirt road a couple miles from the freeway. No fancy equipment, nothing but a tripod, mid-range DSLR, and a mid-range telephoto lens. (And a wary eye for coyotes, rattlesnakes, and other critters.)
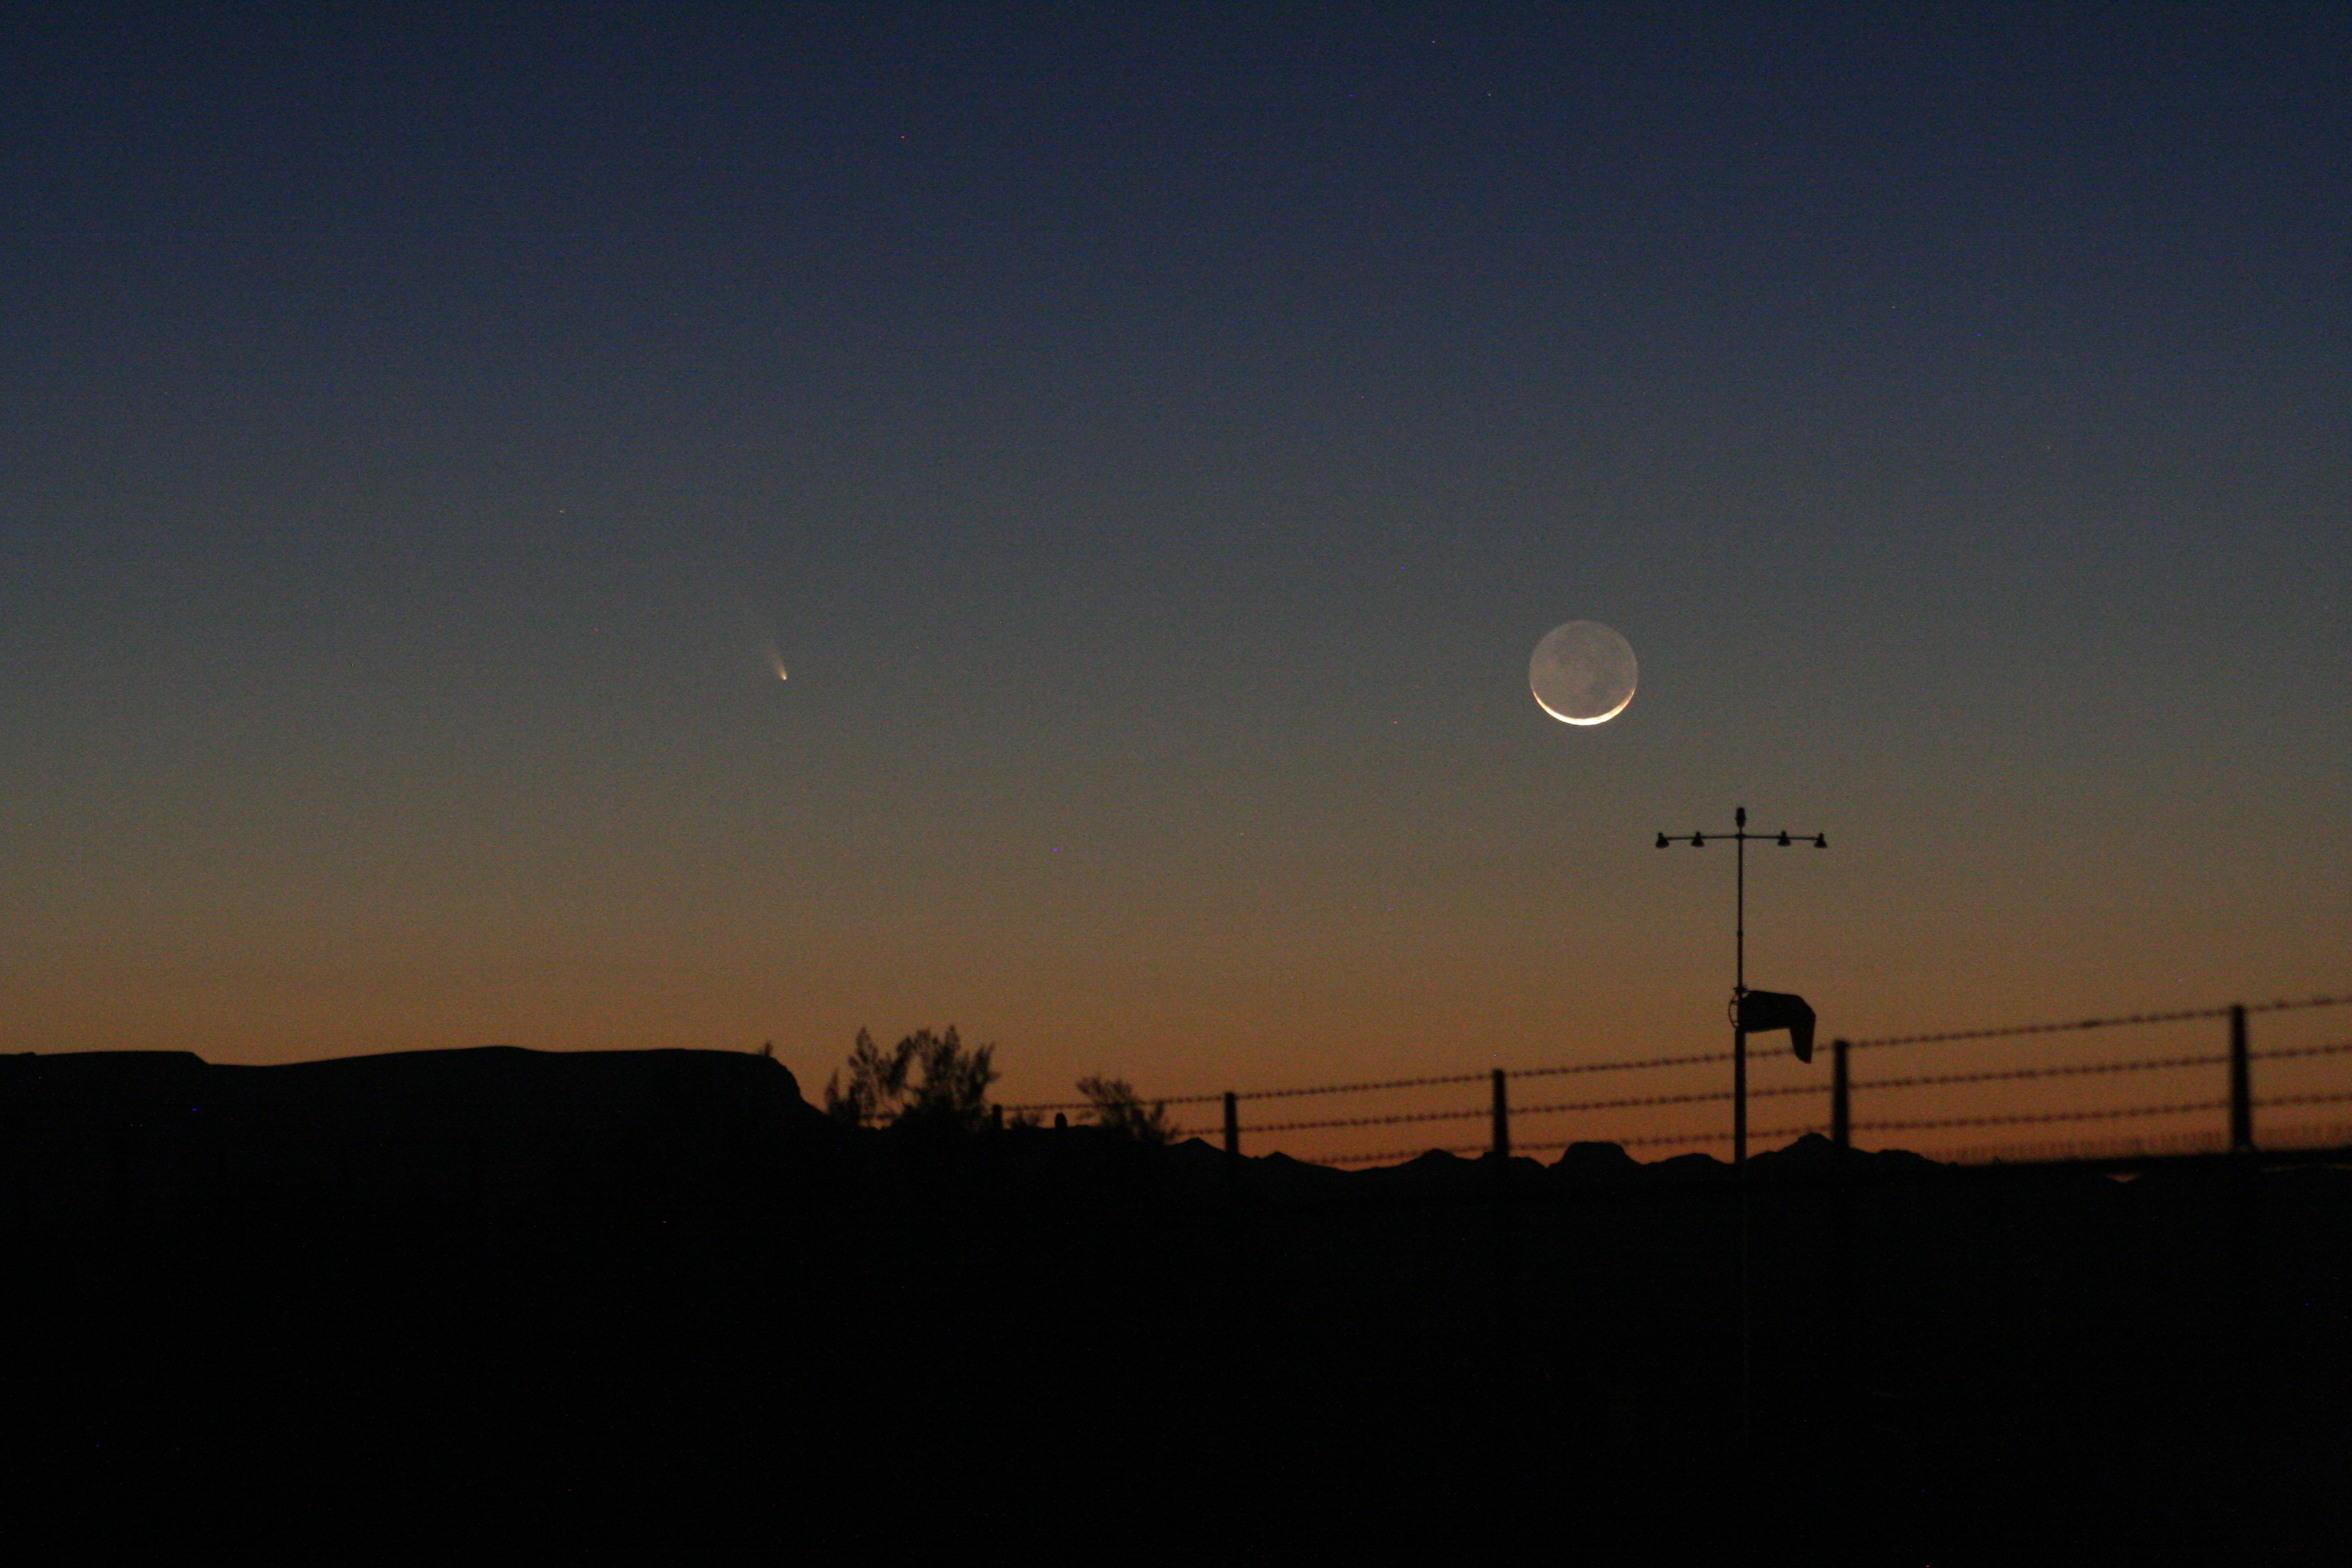
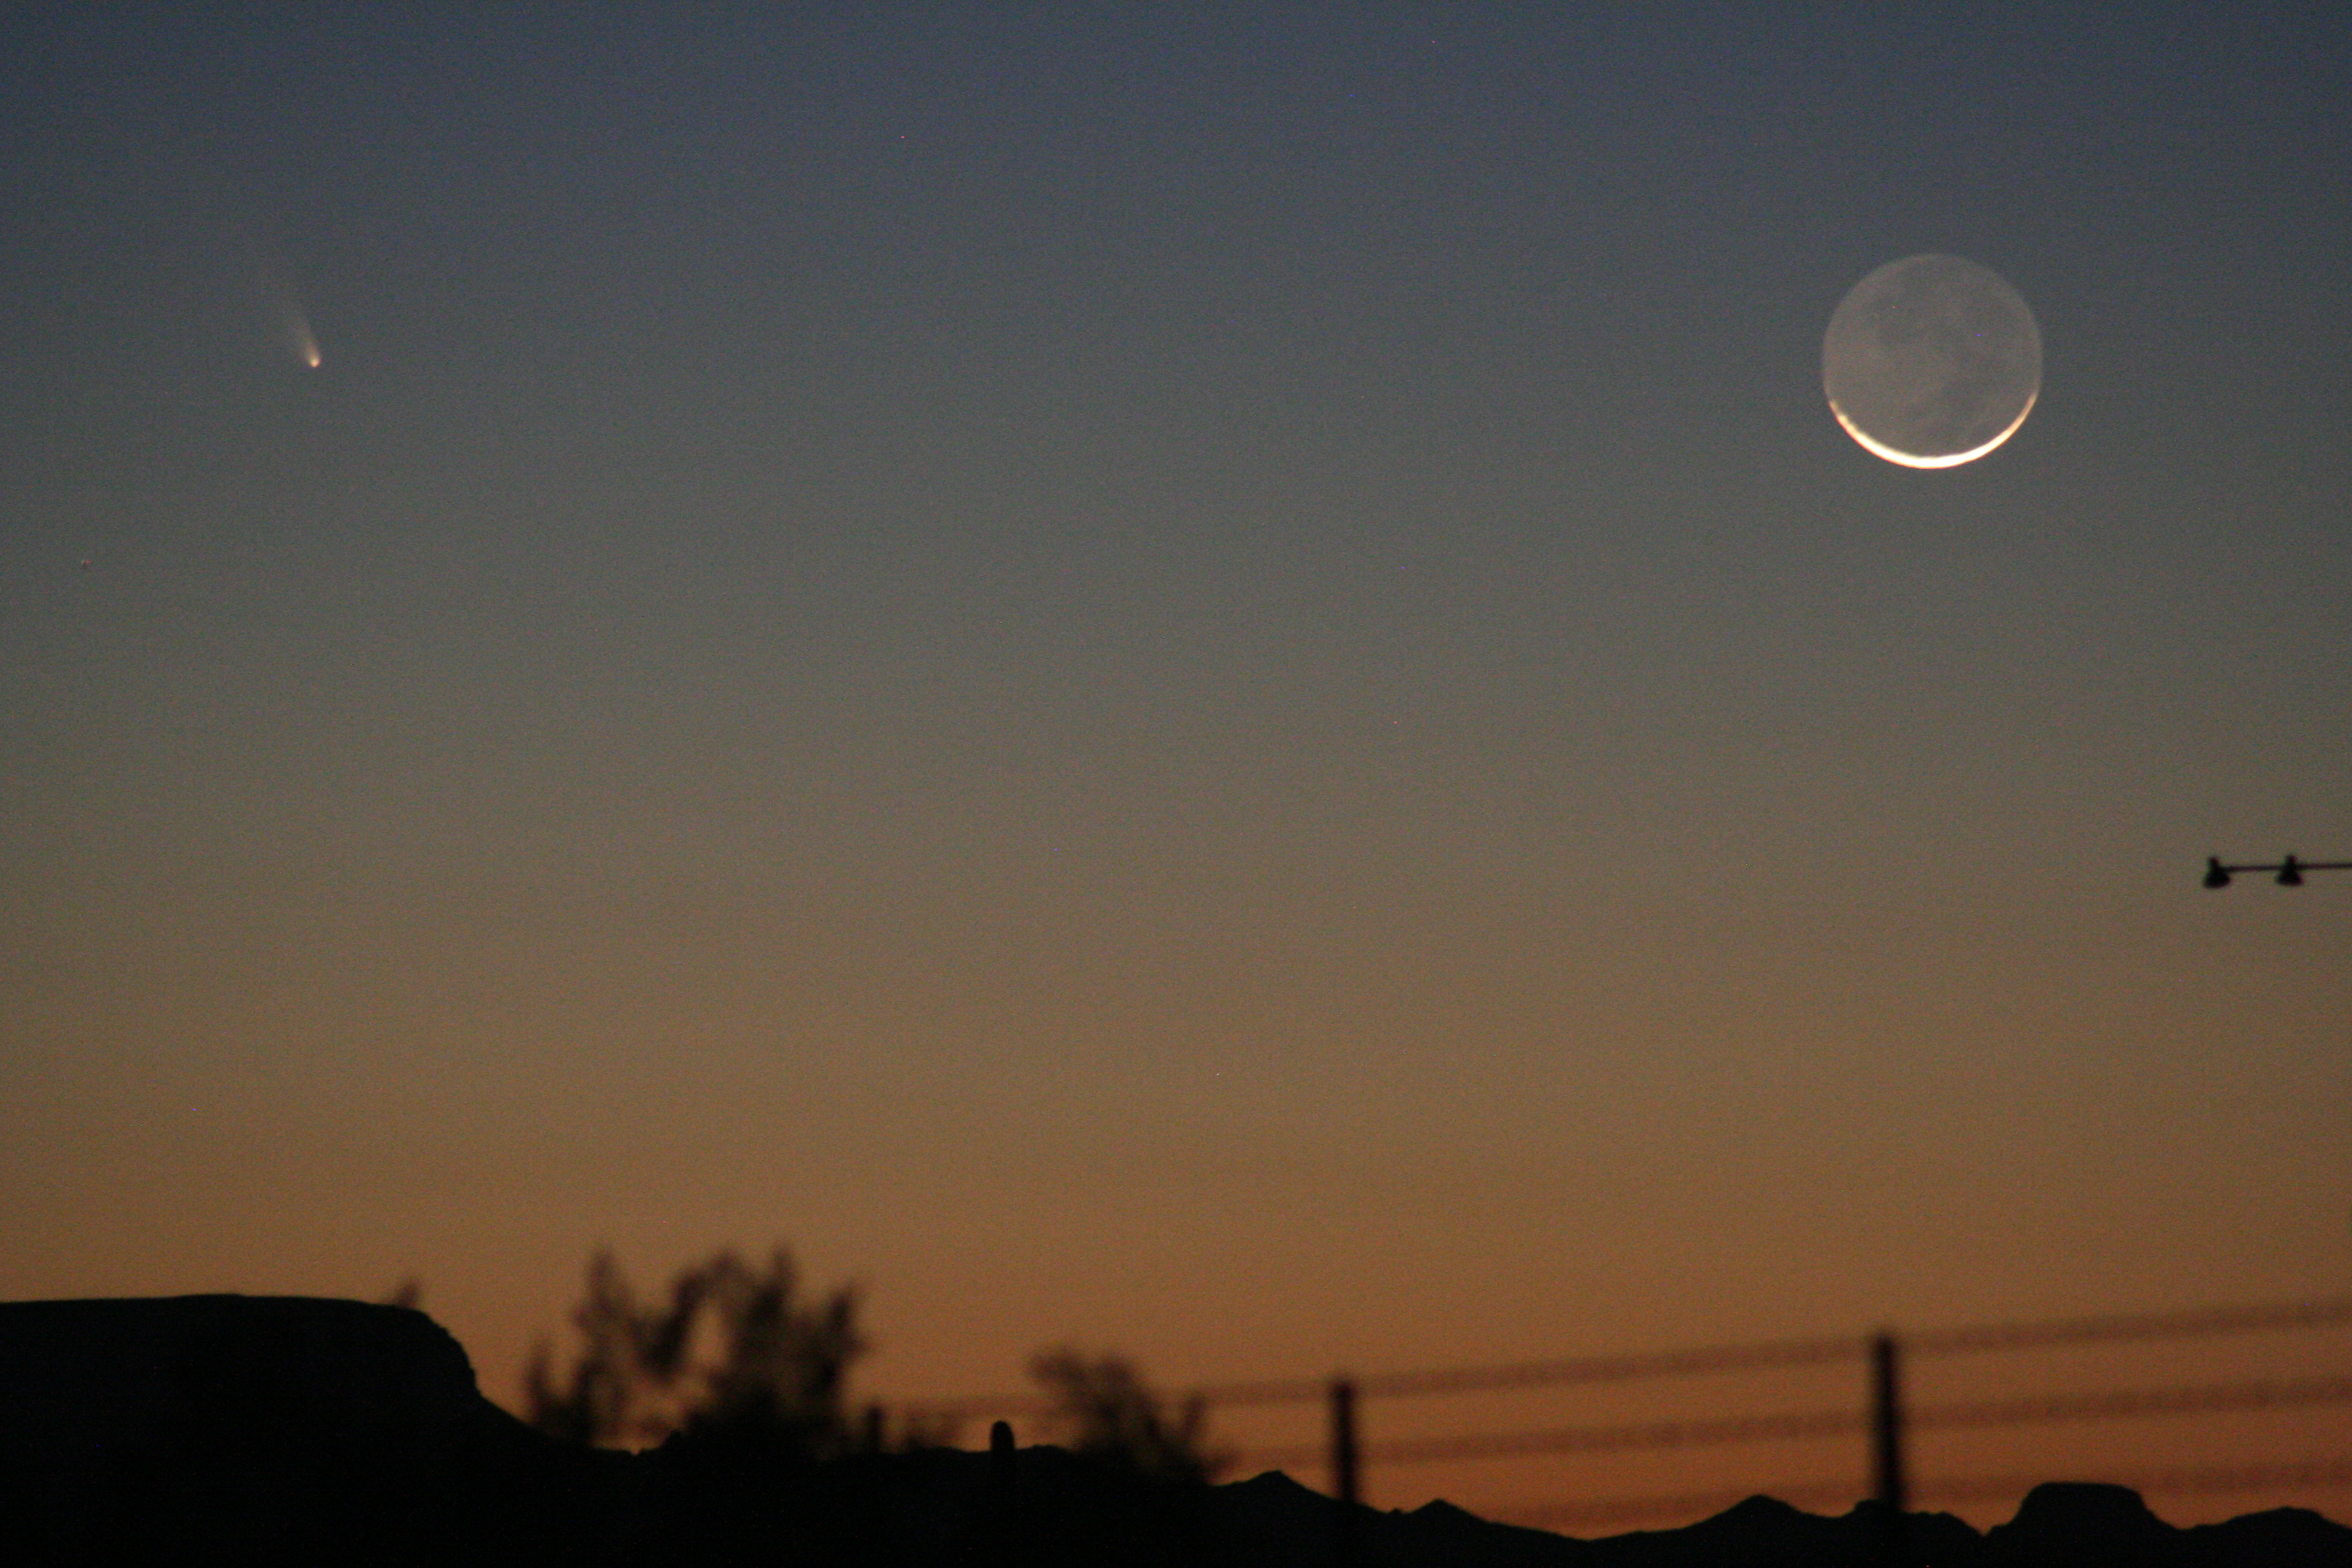
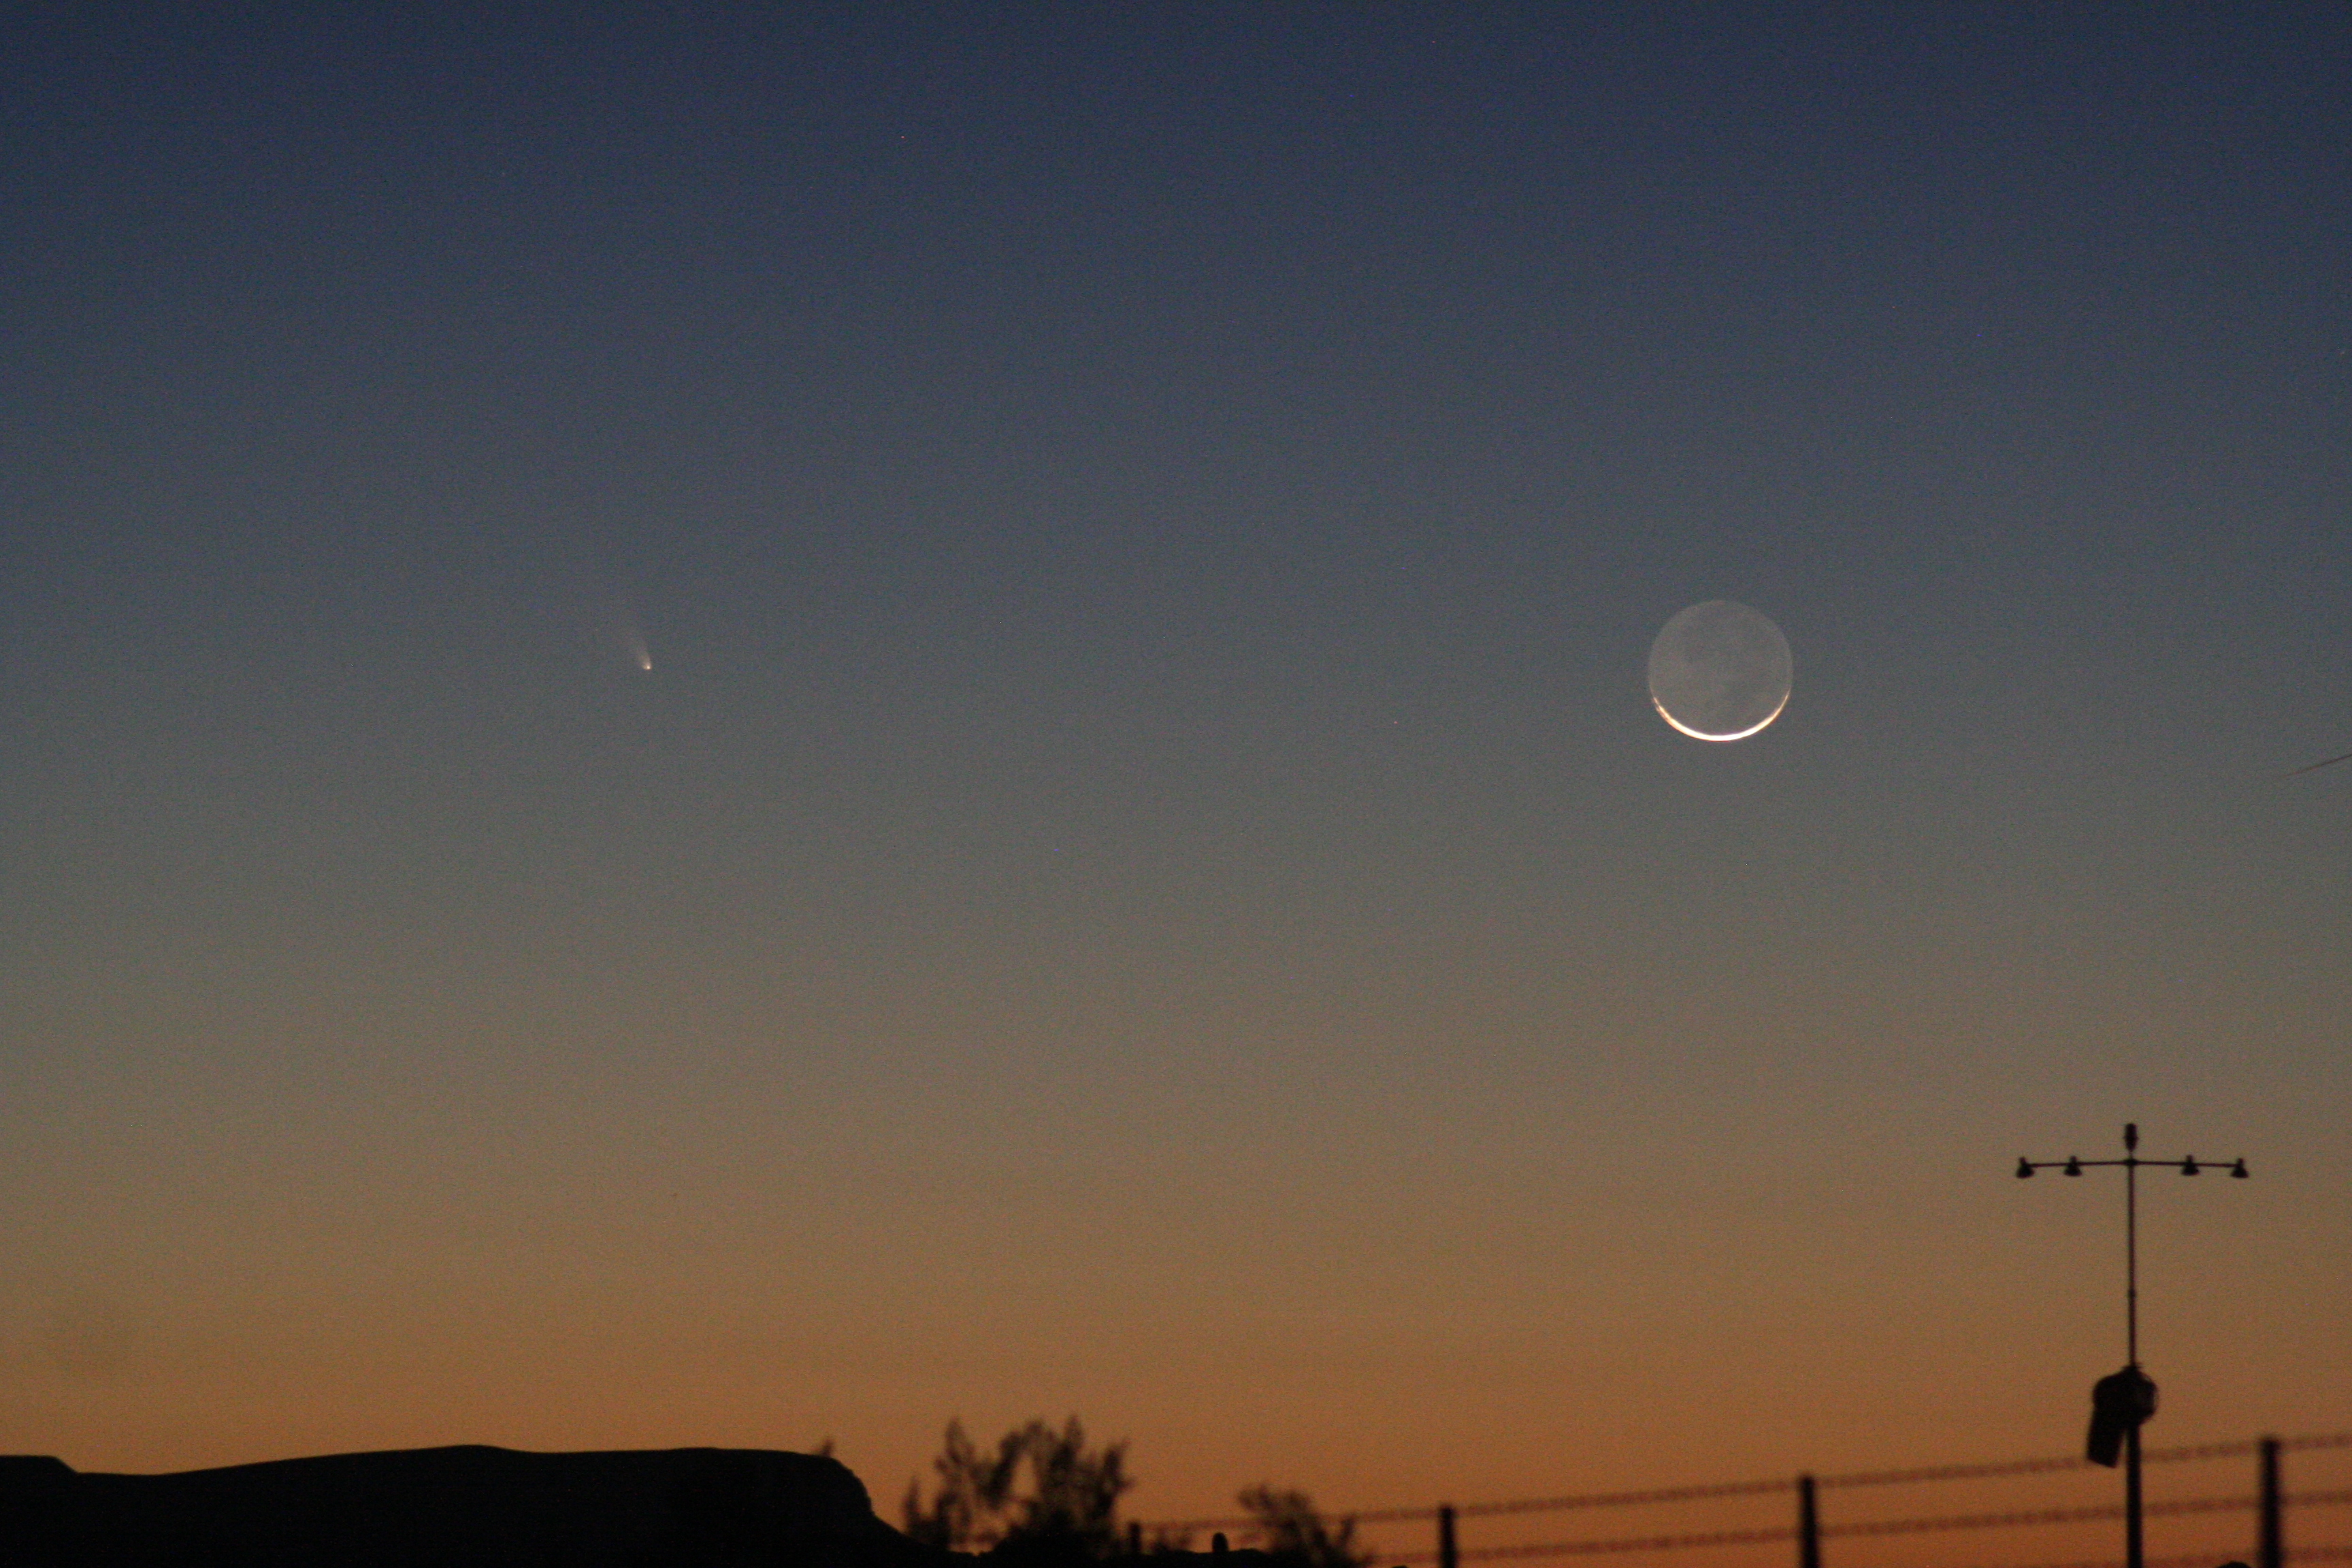
The secret to getting this beautiful picture is that this picture isn’t the only picture I took that night. It’s the one really good picture that I’m showing you out of the hundreds and hundreds of pictures that I took that night. DIGITAL PHOTOGRAPHS ARE CHEAP! You need a little bit of experience to know how to get things set up to start (know where and when to look at the sky, make sure your equipment’s in good shape and clean, use a decent tripod, know how to use the non-automatic settings on your camera in order to override the default settings, use manual focus instead of auto-focus, etc) but once that preparation and experience puts you in the ballpark for good photos, take a ton of photos to “bracket” your exposures and settings.
From the time we set up and it started to get dark enough to see the comet, I took multiple series of photos, starting each series at about 1/10 second and increasing the exposure on each through about 15 seconds. The pictures taken at 1/10 second are so underexposed that they’re almost black, barely showing the moon; the pictures taken at 15 seconds are so overexposed and blurred that they’re almost completely white. Each series of pictures has twenty or so pictures in it at 0.10 second, 0.125 sec, 0.167 sec, 0.20 sec, 0.25 sec, 0.33 sec, 0.40 sec, 0.50 sec, 0.60 sec, 0.80 sec, 1.00 sec, 1.30 sec, 1.60 sec, 2.0 sec, 2.5 sec, 3.2 sec, 4.0 sec, 5.0 sec, 6.0 sec, 8.0 sec, 10 sec, 13 sec, 15 sec, and so on. It takes maybe two or three minutes to do a “set” of pictures. Then change the view, change a lens, zoom in, zoom out and take another set. Repeat as necessary or possible, in this case until the moon and comet set.
How did I know that this picture was the one that was really good? At the time I took it, I didn’t know. I knew that I was taking a ton of photos with different combinations and sets of settings and that somewhere in there would be a couple of good ones. Once you get back to your computer and download everything, you can go through the several hundred photos and find the handful that are fit for human consumption

These photography tips are almost identical to taking pictures of a jack-o-lantern 😀
LikeLike
And who taught you how to take pictures of jack-o-lanterns? Hmmmm??
LikeLike
Pingback: Simple Astrophotography (Part Two) | We Love The Stars Too Fondly
Pingback: Simple Astrophotography (Part Four) | We Love The Stars Too Fondly
Pingback: Intermediate Astrophotography (Part One) | We Love The Stars Too Fondly