Category Archives: Astronomy

Simple Astrophotography (Part Four)

Two months ago I write three articles (here, here, and here) about some simple and easy ways to use little more than a digital camera and a tripod to get some pictures of comets, the stars, and the ISS as it flies by overhead.

Last month I gave everyone a heads up about Saturn and the moon being near each other in the evening sky, making Saturn easy to find for even the novice backyard astronomer. I took a bunch of pictures that night (of course!!) and wanted to share with you, especially since a similar viewing opportunity will be coming up in mid-July.

First I was simply taking pictures of the waxing gibbous moon using my Canon Rebel Xt DSLR and a Tamron 70-300mm telephoto zoom lens.

IMG_6329_small(Click on any image to enlarge & see the full-sized image.)

A telephoto lens of this size won’t let the moon fill the frame, but it’s more than big enough to let you see considerable detail. It’s critical to get your focusing correct. You can try to let the camera autofocus to get you in the ballpark and I’ll take a few pictures using autofocus, but I always try to take most of my pictures focusing manually to get it perfect.

You’ll need to bracket a number of pictures to get the exposure correct on the moon. Remember the rule – “Digital photographs are CHEAP!” The moon will be far, far brighter than your camera thinks it is, while the camera’s light sensors will try to average over the whole frame to set the exposure if you’re in full automatic mode. So full automatic mode will give you pictures of the moon way, WAY overexposed, just a huge white blob.

For example, on this night the camera on full automatic mode wanted to do exposures in the 1/30  second and 1/60 second range. I shot bracketed exposures all the way down to 1/500 sec and then double check, only to be amazed that they were still seriously overexposed. This picture was taken at 1/4000 sec at f5.6, the fastest the camera will go.

You may be photographing an object in a really dark, black sky, but it’s really bright, especially as you get closer to full moon.

IMG_6407_small


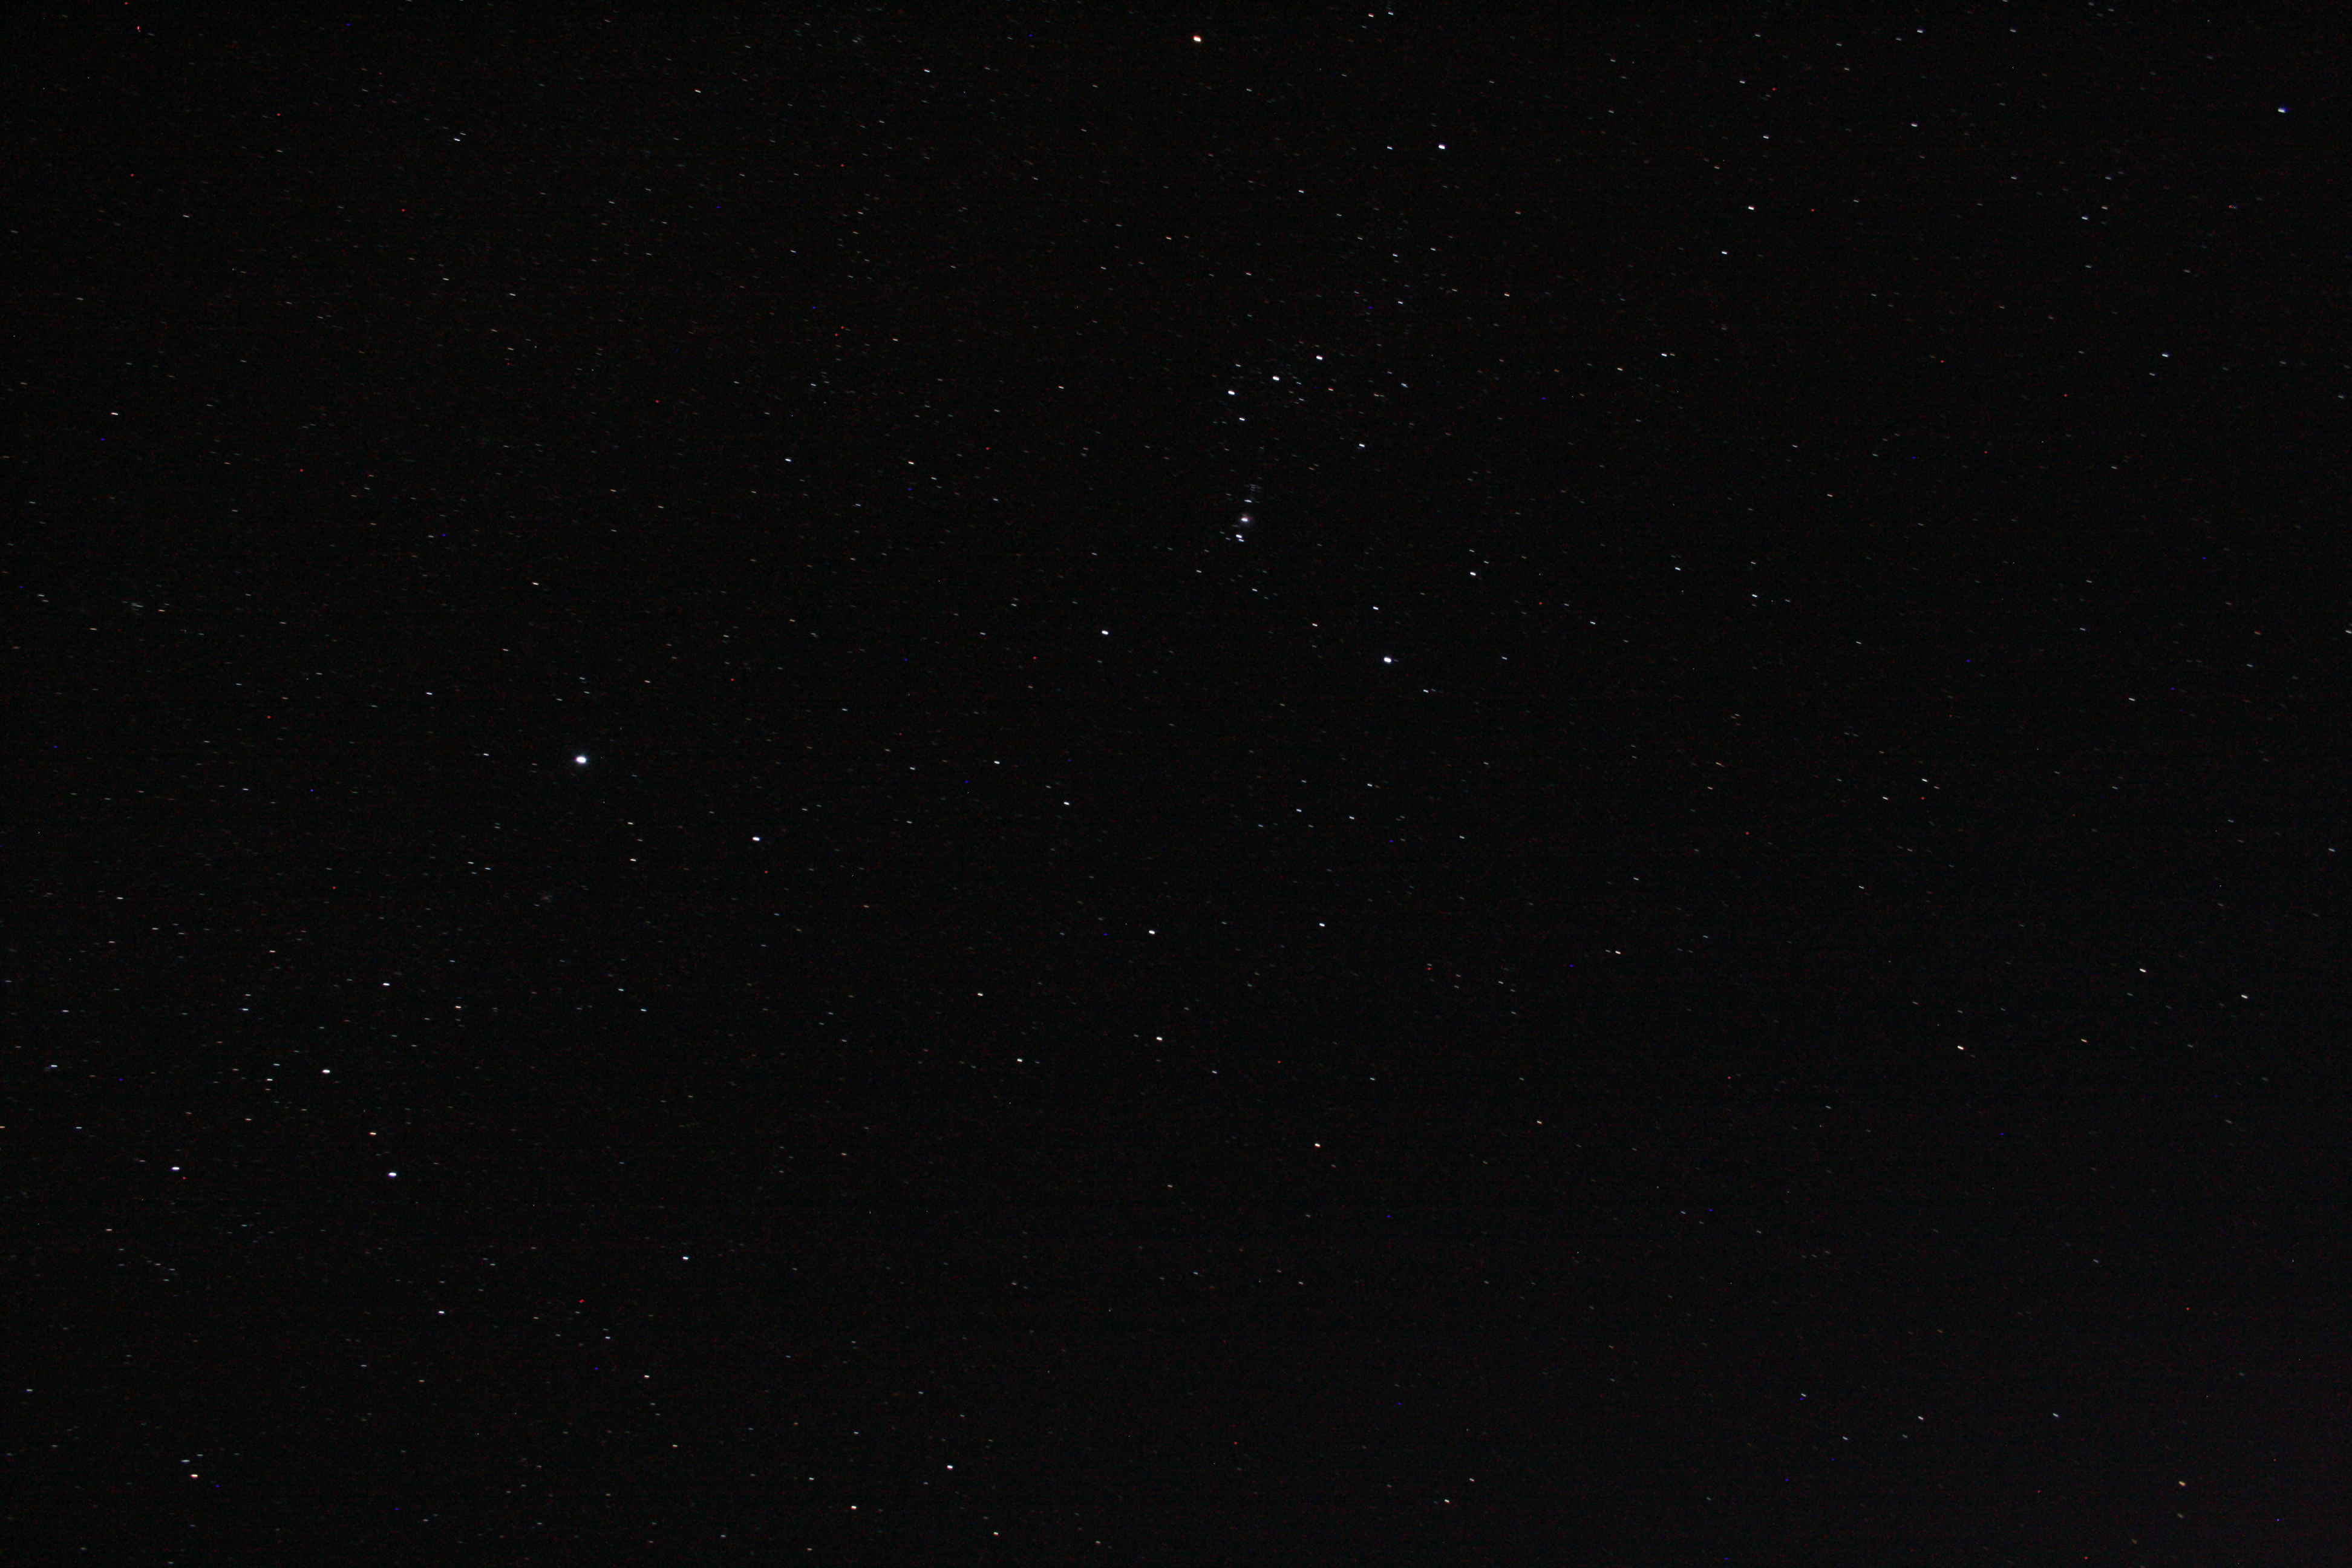
I tried to take pictures of Saturn with this lens, but at 300mm it’s just not big enough to show any detail. Saturn here is the bright dot just above center, but the only thing making it look like it’s bigger than a dot is a slight vibration in the camera during the 1/3 second exposure.

IMG_6427_small


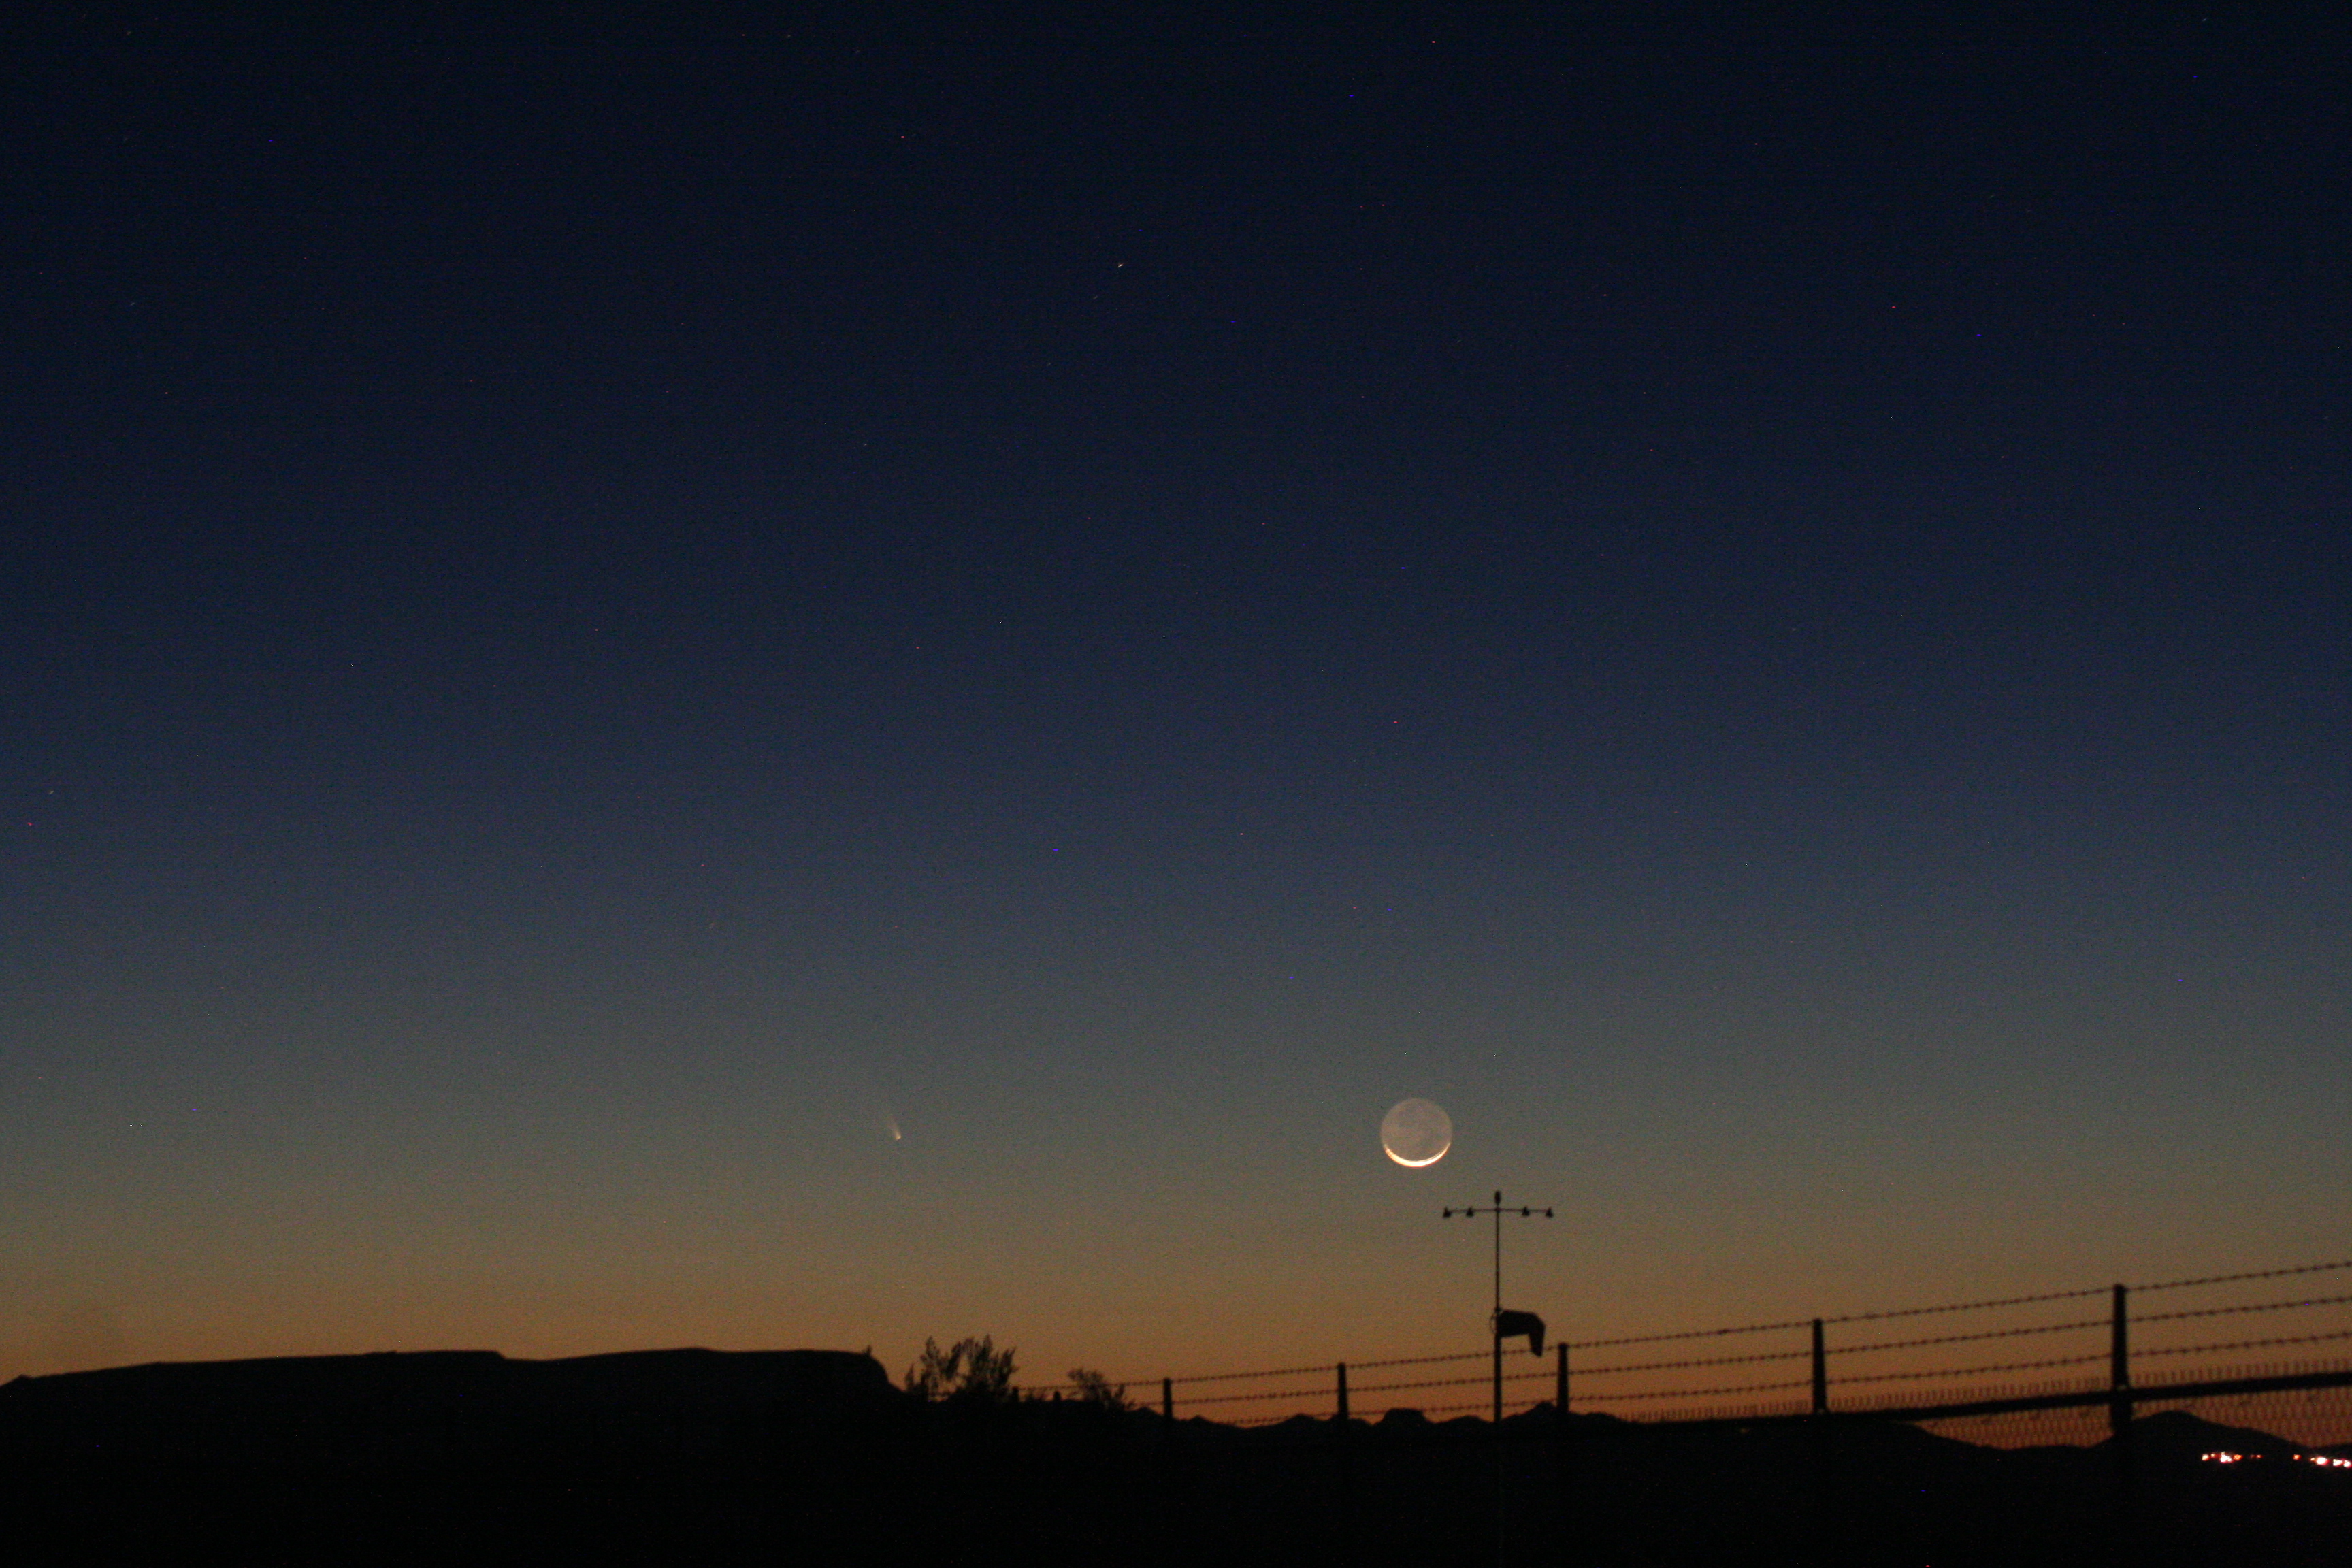
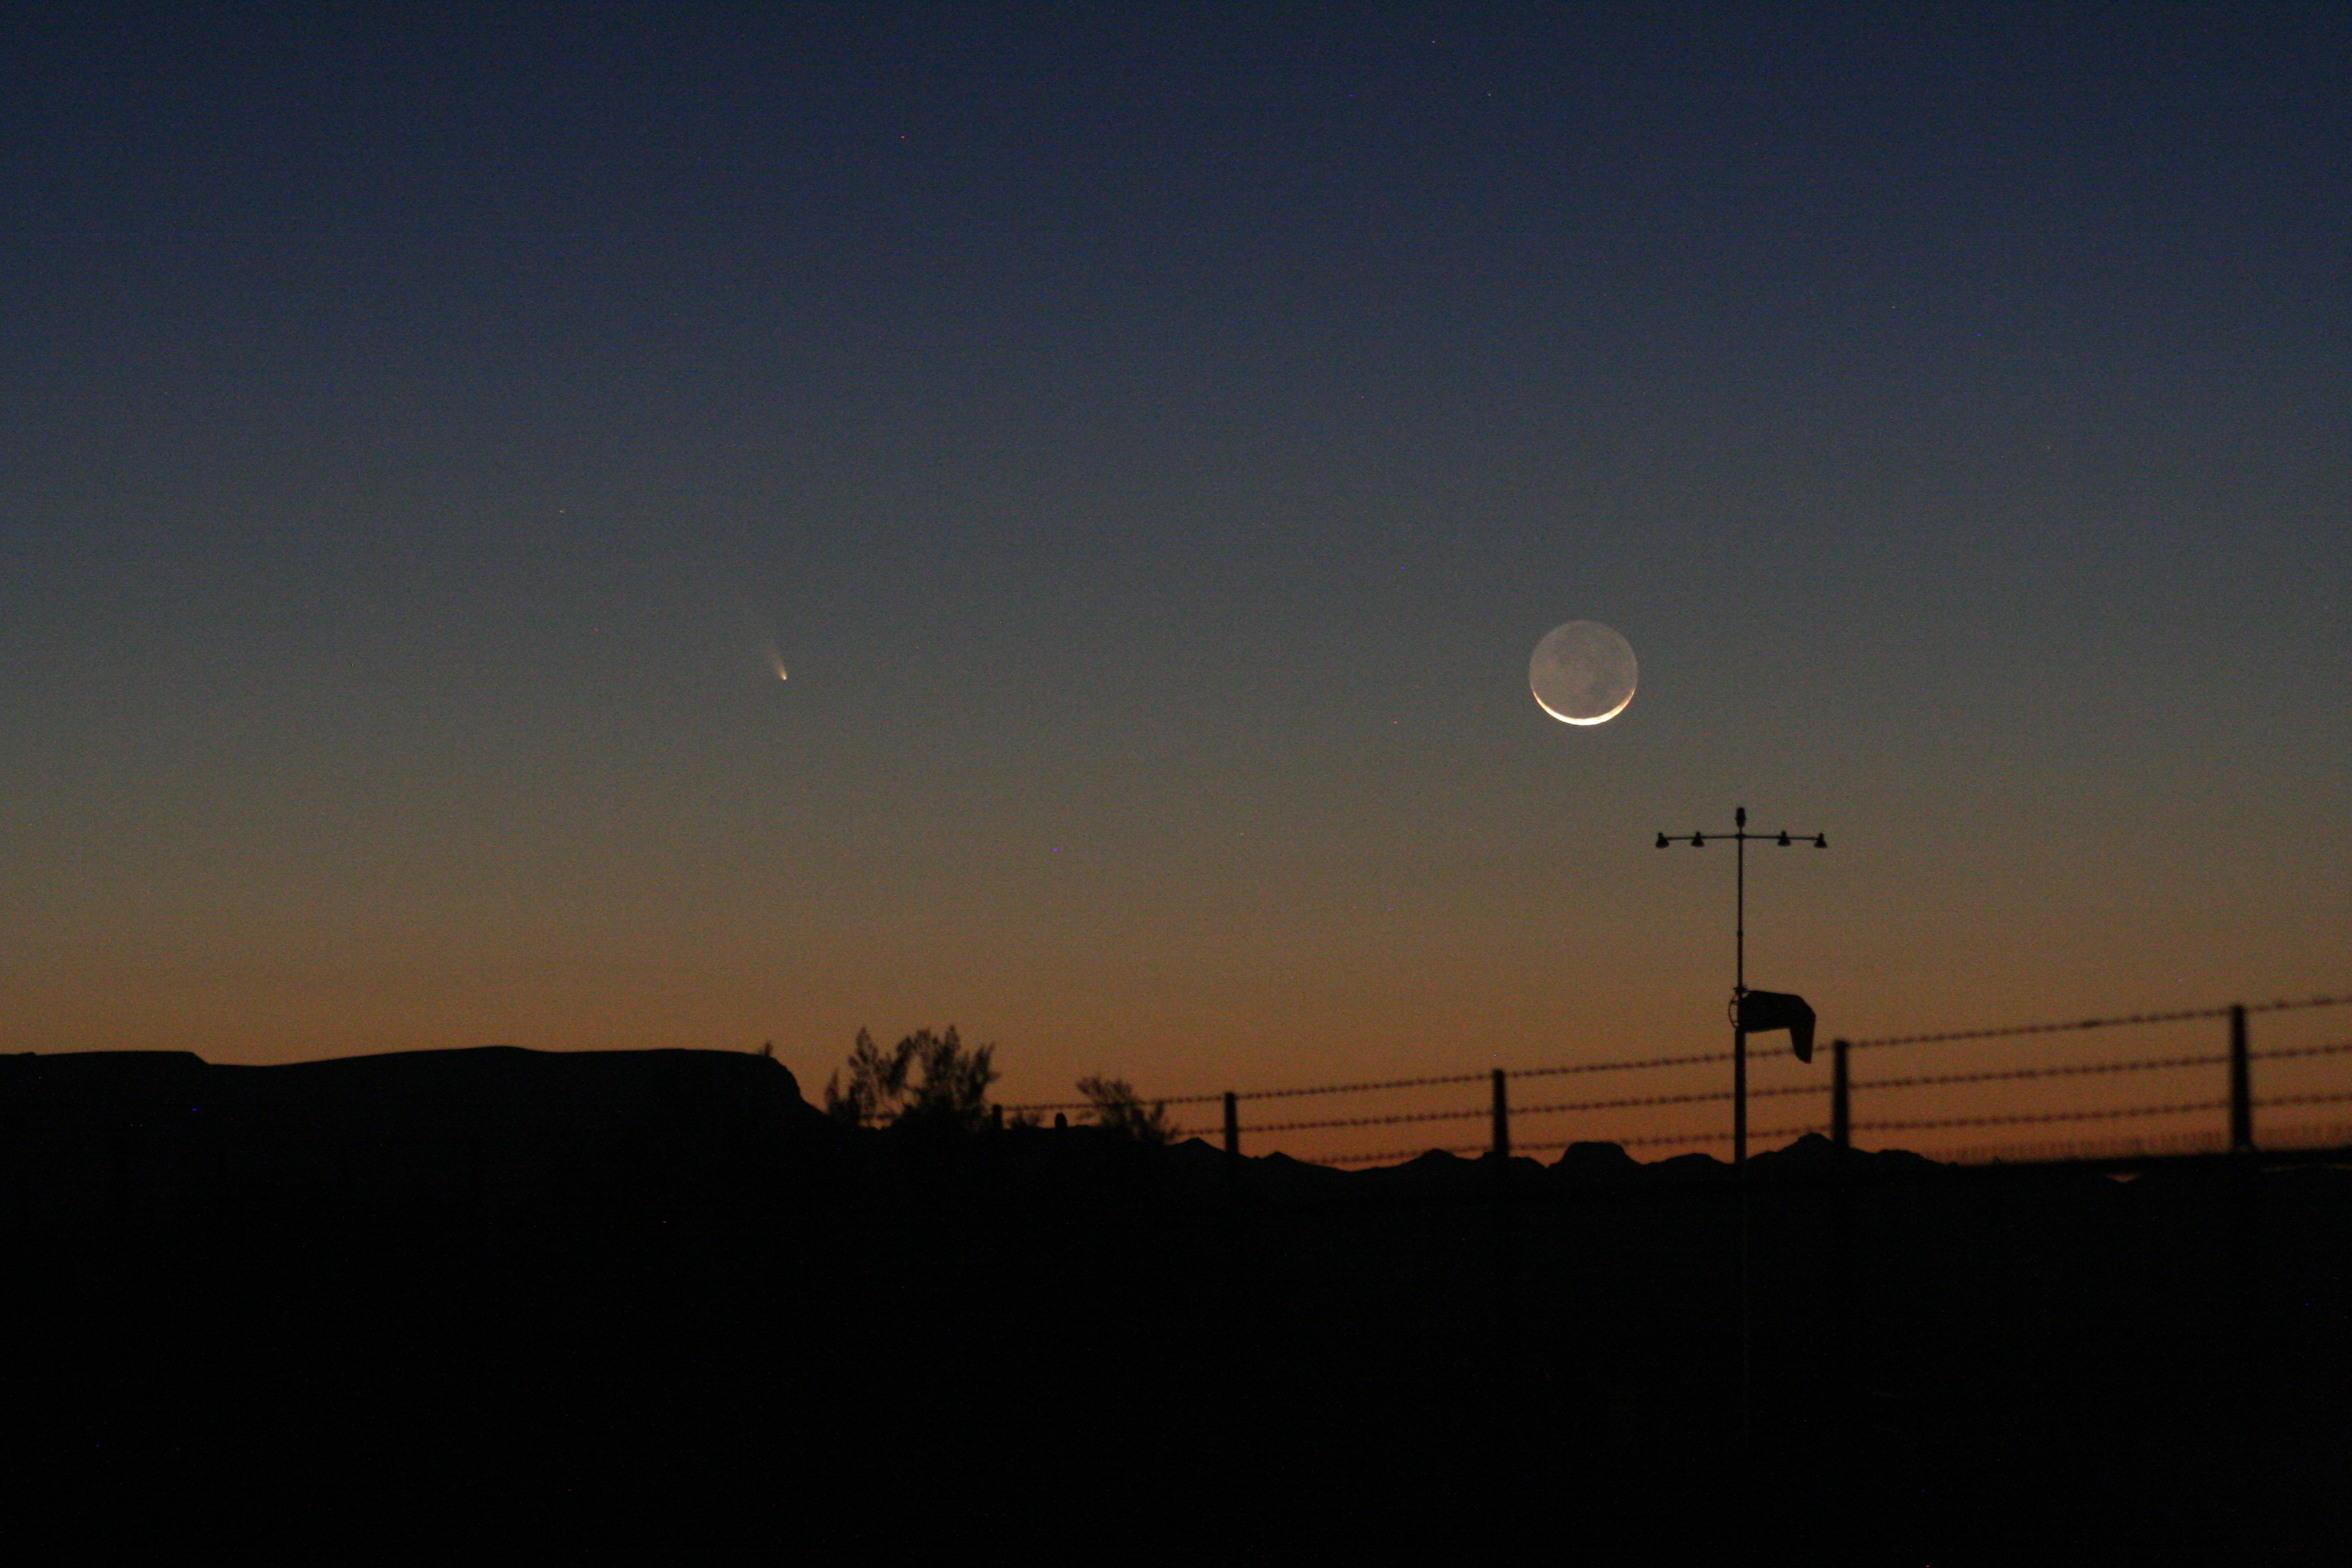
So, given that 1/4000 sec was good for the moon and 1/3 sec was good for Saturn, how does one go about taking a picture of the two of them in the same frame?

Unless you’re using Photoshop, it’s tough. Getting Saturn to show up at all will guarantee enough glare from the moon to wash out the frame, while exposing for the moon will leave Saturn lost in the gloom. Also, for most lenses, if you put the moon anywhere near the center of the picture you’ll get horrible ghost images from the internal reflections in the lens. The lens flare seen above is one thing (think JJ Abrams!!), multiple ghost images across the frame are another.

The next step for me is to try to go beyond “simple” astrophotography into what we might call “intermediate” astrophotography, using telescopic gear that the average person won’t have just lying about. We’re not talking about tens of thousands of dollars in gear here – it’s absolutely amazing what you can get for $1,000 or less, telescopes that would have cost twenty or fifty times that just twenty years ago. Still, it’s not “simple”.

I hope we’ll get to that later in July.

One final extremely simple astrophoto that you can take, which I spotted at the Angels game on July 4th. If you go out just after sunset these days and look to the west-northwest you’ll see a really bright object sinking toward the horizon an hour or two behind the sun.

That’s Venus.

IMG_8127_small


Way above the roof of Angels Stadium you see two big, blobby, ghostly images – those are reflections of the lights under the roof. But just a smidgen above the center of the roof, right over a green stanchion or support sticking up, you can see a clear, bright pinpoint.

Voila! Even in the glare and lights of a fully illuminated baseball stadium, you can spot (and photograph) Venus.


1 Comment

Filed under Astronomy, Photography

Heads Up! Look At Saturn Tonight!

For those of you on Earth tonight, it will be a great time to spot the planet Saturn just after dark. (For those of you not on Earth, please contact me immediately about how I can join you.) It doesn’t matter where you are, east or west, north or south – if you have a sunset today and can see the moon (i.e., if it’s not cloudy and/or pouring rain and/or you’re indoors), you can spot Saturn.

Saturn will be very near the moon tonight after sunset, and the moon is a honkin’ big bright thing that’s easy to spot, so that will make Saturn easy to spot. To the naked eye Saturn will look like a bright, slightly yellowish colored star very close to the Moon.

Here’s a link to an online, interactive sky chart from Astronomy Magazine if you need help or want more detailed information.

In a pair of decent binoculars you should be able to at least see some elongation and possibly even some of the rings of Saturn. (And in binoculars, the Moon is fantastic, particularly along the terminator, the line between light & dark.)

If you have a telescope of any size, you can easily see the rings of Saturn – the bigger the telescope, the better the view.

Even if it is cloudy or pouring rain or you’re stuck indoors tonight, don’t fret – Saturn’s not moving much (from our point of view), although the moon is, so Saturn will still be there tomorrow and Friday and next week and into July. You just won’t have the moon right next to it every night to serve as a viewing guide.

And tomorrow we’ll get a view back at us from Saturn. The Cassini spacecraft will pass through Saturn’s shadow and will take a picture of Saturn’s night side and eclipsed rings, which will also show the “pale, blue dot” that is Earth from 851 million miles.

So remember to look up and wave tomorrow at about 2:30 PM PDT! Smile and say, “Cheese!”

14:50 PDT UPDATE: So that whole “tomorrow at about 2:30” thing for waving at Saturn. It seems that me and about half the Twitterverse got that wrong. The article quoted above quite clearly says “July 19th”, as in “July” and not “June”. So reset your alarms for next month, OK? (But still go look at Saturn near the moon tonight, or tomorrow, or Friday…)

1 Comment

Filed under Astronomy, Space

Not EVEN Astrophotography! (Welcome Back ISS Expedition 35!!)

This is why you keep your cameras ready to grab at a moment’s notice.

IMG_5927   IMG_5941

The moon’s pretty easy to grab a picture of, even with just a decent telephoto lens. If I had bothered to grab a tripod, the pictures would have been even better (particularly the right-hand one), but I just saw the jet coming while I was out walking the dog and watering the new grass (it’s still growing great!) and I didn’t have time to get fancy. (Next time, I promise. Maybe.)

Also, I want to welcome back to the Green Hills of Earth the Expedition 35 crew, Chris Hadfield, Thomas Marshburn, and Roman Romanenko. They’ve done a damn fine job and the “contingency” spacewalk to fix an ammonia coolant leak that they pulled off (along with the three Expedition 36 crew members that are still on orbit) with less than 48 hours of planning was a perfect example of why the best thing to get the job done in space is often trained and flexible human brain working with a good pair of hands and an amazing team on the ground backing them up.

Leave a comment

Filed under Astronomy, Photography

Simple Astrophotography (Part Three)

In the last two days we’ve discussed simple ways that you can use basic photography equipment that you very well may already have sitting around to take simple but decent photos of astronomical events. What else can we do?

The next simple step for me, which is still really a work in progress since my results are pretty spotty to date, is video. I’ve got a decent, palm-sized, HD camcorder. What can it record?

Turns out – not much, at least not yet. The first problem is that digital video is basically just a whole bunch of 1/30 second exposures recorded and then played back rapidly in sequence. As we saw with the moon & comet photos on Monday (2.5 second exposures) and Tuesday (15 and 30 second exposures), when you’re taking video of things that are dark (i.e., some variant on the twilight or night sky) you need a long exposure to gather enough photons to show anything. 1/30 of a second isn’t going to cut it.

I also said to try it to see what happens, fail early, fail fast, fail often, learn from it, adjust, fail again, and so on. Which I’ve done, trying several times to record the International Space Station as it flies overhead. Video lends itself to an ISS overflight since the ISS tends to be bright (as bright or brighter than Venus or Jupiter) and fast (crosses the sky from horizon to horizon in just five minutes or so).

First of all, if you haven’t seen an ISS overflight, do so ASAP when the opportunity is available. It’s stunning, especially when you realize that it’s a spaceship that’s the size of a football field weighing almost a million pounds with crews continuously occupying it for over twelve and a half years. When the timing is right for it to be passing over your location just after sunset or just before sunrise, you can easily see it soaring across the sky, a sight both beautiful and inspiring. There are apps that can tell you when it’s visible from your location for the iPhone, Android, or your computer. Trust me, it’s great! (I will admit to preferring the evening passes just after sunset over the early morning passes just before sunrise.)

On April 8, 2013 at 19:11 PDT there was an utterly fantastic pass over Los Angeles. Sometimes a pass will be off to one side of your location and you’ll only be able to see the ISS for a short time and it won’t get very high above the horizon. The really great passes are the ones where the ISS comes right overhead and you see it from horizon to horizon. There had been several pretty good passes over Southern California in the evening in early April, but the April 8th pass was supposed to be the best of all. I again tried to get some good video.

I mentioned that the first problem with video is the short exposure time of each frame. The second problem I’ve found is that to really see the ISS well you need to zoom in, but once you’ve done that you lose all reference points so you don’t really see that the ISS is moving. As you track it across the sky you just see it as a bright dot on a dark background. (You will NOT see the ISS in detail with this simple setup. See here and here for some fantastic pictures done by some amazing photographers with some big equipment – Thierry Legault’s entire site can be browsed for hours!)

The third problem is that it’s very difficult with the typical handheld, commercial, household, consumer camcorder to see what you’re recording when your subject is really dark. In the old days (like, ten years ago) you had the option of looking through a lens and seeing the image you were recording, much like you do with a DSLR still camera. These days, unless you’re using professional quality video gear, you’re looking at a flip out LCD video screen a couple inches across. That flip out screen does a lousy job of showing a dark image, which your recorder is doing a lousy job of recording to being with, so in large part you’re just blindly pointing the camera in the general direction of your target and hoping for the best. You’ll find out later if you “caught” anything.

So it was on April 8th as the ISS rose in the west-southwest and headed for the zenith. It was so bright that I was able to actually see it on the flip out monitor most of the time and I shot a video that’s about nine minutes long as I was waiting for it to rise, spotted it, moved the tripod a couple of times as I maneuvered around trees to keep the ISS in view, and finally watched it disappear to the northeast. Since I had no clue if I was actually capturing on video any of what I was seeing, I kept a running commentary going so that I could at least use the audio from the recording to know what was going on.

Once back inside, from that nine minutes of raw footage, there’s one twenty-six second segment that I think is pretty cool. One of the reasons that it’s cool is that by sheer luck I dodged problem #2, the lack of reference for the ISS’s motion. The ISS’s path that night took it right up through the constellation Orion, and even with the video’s problem with short frame exposures, the bright stars in Orion can be (barely) seen. Here’s an annotated frame-grab from the video, showing the three “belt” stars of Orion, the “left leg” star (Saiph), the location of the “sword” of Orion, and the ISS. (I’m pretty sure I can see the sword stars faintly in the original, “m2ts” format, 46 MB, uncompressed video — perhaps not so much in the converted, compressed, “mp4” format, 4 MB file uploaded here. Let me know if you can see them when you view the video.)

ISS Through Orion Screen Grab (Annotated)

Remember that yesterday I mentioned “noise” and “saturation” on video chips when recording something really dark, effects which give a grainy, colored look to the image. The chips in DSLR’s are bad when you get to 30-second exposures. The chips in HD camcorders are a lot worse, looking ratty even with these 1/30 second exposures. The stars are a little easier to see in the video than in this screen captured image (thanks to the “persistence of vision” effect, I’m guessing), but to make it a little easier to follow along, here’s what you’ll see and hear in the video after the credits end.

0:10  “Zooming back out” [Zoom out to see some trees in the twilight, you can also see Sirius, a really bright star, on the left side way up above the tree there — at this point the ISS is perhaps 30 degrees above the horizon]

0:13 “Zooming back in a little bit” [ISS visible in center of frame, Orion’s “right foot” star Rigel, a bright one, visible at lower right — after a second or two, quickly pan up to follow the ISS and then hold the camera position on the view shown above]

0:18 “OK, let’s watch it go across the field.” [ISS goes up right past the “belt”, passing through the frame in about fourteen seconds]

0:32 “That is gorgeous, it is going to come right up overhead” [Pan up again to follow ISS, “belt” stars disappear off the bottom of the frame]

Lights (reflected sunlight off of the ISS’s solar panels will do!), Camera (a Canon Vixia HF R100), Action (4.791 miles per second)!

It’s not fantastic – but I think after a bunch of failed attempts it’s a great first positive result. And I’ve got some ideas for what to try next. (For one, I’ll use my “professional radio voice” to narrate instead of my normal “whiny nasal voice”, on the off chance that the video might be successful.)

As always, your comments and critiques are welcome!

2 Comments

May 7, 2013 · 13:44

Simple Astrophotography (Part Two)

Yesterday I wrote about some simple astrophotography techniques for using common DSLR equipment to take pictures of celestial objects, in this case the setting moon and Comet Pan-STARRS on March 12, 2013.

What else can that kind of common equipment do? We know that there are some truly spectacular pictures that can be taken and even actual astronomical research that can be done (hunting for new comets, asteroids, and supernovae, for example) with more elaborate gear costing anywhere from a few hundred dollars to many tens of thousands of dollars. But what about that same simple tripod, DSLR, and maybe a telephoto lens that we were talking about yesterday?

The key is to play with it, try it out, give it a shot, see what happens, make adjustments, try again, repeat as necessary. To repeat yesterday’s key lesson, DIGITAL PHOTOS ARE CHEAP! Fail early, fail fast, fail repeatedly, learn, adjust, go fail some more (and learn some more).

On the day when I took the photos featured in yesterday’s post, what did we see after the moon and Comet Pan-STARRS set below the horizon? We were on our way to Phoenix for a few days of spring training with the Angels and getting hungry, but before I tore everything down and got back on the road, I took the time to take a couple more pictures, just to see what would show up (click on any of the images to enlarge them to full sized):

IMG_7096

This picture was taken March 12, 2013 at 19:45 PST using a tripod-mounted Canon Eos Digitial Rebel Xti and a Canon EFS 18-55 mm zoom lens set at 18mm, manually focused. The exposure was 30 seconds at f5.6. What you see is a decent representation of what our dark-adapted eyes were seeing just as dusk was ending and the stars were coming out in their full glory a long way from the nearest big city.

A minute later I tilted the camera up toward Orion, one of the most easily recognizable constellations, and again shot a 30-second exposure:

IMG_7097

Orion can clearly be seen in the upper center of the image, with Sirius the very bright star in the center-left. In Orion’s sword you can see that the center star of the three is enlarged – this is the Orion Nebula, not a star.

A minute later, a 30-second exposure in the direction of  Taurus and the Pleiades:

IMG_7099

The Pleiades cluster, with an obvious bluish tint, is at the lower center, with the V-shaped constellation Taurus just a bit above and to the left of it. The bright star at the top left of the “V” is Aldebaran. The bright “star” which looks to be at the top right of the “V” is actually not a star, but the planet Jupiter.

Looking at all three of these pictures I see both amazing detail and annoying imperfections. It’s amazing to me that this level of detail is available in what was simply a quick, toss-away, experimental set of pictures. On the other hand, there is room for improvement. First of all, when seen full sized, all three pictures show the stars not as points but as tiny streaks, lines, or arcs. This is because the camera was fixed and the Earth was moving, and even on a relatively short, 30-second exposure, this motion is apparent. To avoid this we would need to mount the camera on a telescope mount which tracks the stars, moving the camera one way exactly in time as the Earth moves the opposite way. (Not hard to do, but that’s not what this conversation is about. Later we’ll play with this. Promise. Bug me about it if we don’t.)

In detail, all three pictures show some digital artifacts, both subtle lines and bands in the background and red or blue “hot pixels” throughout the image. In fact, if you load all three pictures at once and quickly “blink” back and forth between them, you can see the hot pixels as they always stay the same in each image while the pictures change. These flaws are a product of how the digital images are produced and if you get more serious about digital astrophotography, they can be dealt with. The hot pixels can be mapped and corrected using image processing software such as Adobe Photoshop. The “banding” artifacts come from long, dark exposures when the digital sensor starts to become saturated and display “noise”. More advanced astrophotography generally uses many shorter exposures which lessen this signal noise are then “stacked” (using software) to give a complete picture showing the results of the combined longer exposure times.

But that’s not what we’re talking about doing here — it’s just to let you know that this is a first step and that there’s a lot more that can be done if you wish. For simple starters, this is pretty cool!

Wait — there was one more thing we had that March night in the Arizona desert. The pictures above were all taken with a 18-55 mm lens, while the moon & comet photos shown yesterday were all taken with a 70-300 mm lens. What if we had used the bigger telephoto lens, say, on Orion? Glad that you asked (you get a gold star):

IMG_5381

This is a 15-second exposure taken at 19:42 that evening, showing the three “belt” stars of Orion across the upper right, the “sword” coming down just above the center of the picture, and the two “leg” stars just below center (Saiph just to the left, Rigel to the right). With this image the stars are now showing visible trails or arcs even in the smaller sized image, the magnification of the telephoto lens more than offsetting the shorter exposure time. On the plus side, the Orion Nebula in the middle of the “sword” is clearly showing that it’s not a star but instead a large, glowing cloud of gas.

So these results aren’t bad at all for a “fast & dirty” effort using nothing but the relatively common photography equipment we already had on hand. There are obviously things that can be improved upon (a relatively simple telescope mount will track the stars and eliminate the trailing, for example) but these photos show how you can get a lot of bang for your buck to start.  Just try it, see what happens, try it again! You may be pleasantly surprised with the results, and you never know what you might catch a picture of.

For example, click on that first picture up there, the one taken just after dusk. Blow it up big so that you can see all of the detail. Full sized, look way up in the upper right corner.

Meteor Or Satellite

You can see that all of the stars are “trailed” here a bit, and there’s a lot of detail visible about their varying brightness and colors. But what’s that little white streak? It’s a lot longer and in a different orientation than all of the stars, so it’s not a star. It’s probably not a digital artifact or hot pixel since it doesn’t show up on any of the other pictures. It’s not an airplane since they show up as a series of red & green dots from their blinking anti-collision lights.

Is it a streak from a meteor? Maybe. Or is it a satellite trail? Could be, it was just after sunset, prime time for seeing satellites, although I would think a satellite would make a longer trail on a 30-second exposure. Maybe it wasn’t a low, fast moving satellite but one further out and going slower. Or maybe it’s just a quick flare off of a satellite’s solar panels, like an Iridium flare. If it was a satellite, which one? There are databases of satellite positions and software for calculating when they can be seen from different places & times. We were at about 33 deg 36′ N and 113 deg 38′ W and the tag on the photo says it was taken at 19:45:50 PST on March 12, 2013.

The identification of the satellite (if that’s what it was) is left as an exercise to the reader.

2 Comments

Filed under Astronomy, Photography, Space

Simple Astrophotography

Enough about me – what about the universe?

I’ve been an amateur astronomer since I was a teenager and I’ve been trying to take decent pictures of the heavens about as long. In the early 1970’s this was an expensive hobby. Due to the relatively high costs involved with film photography, it paid to have a pretty good idea of what you were doing before taking a picture. But the only way to know what you were doing was to take lots of pictures, so it helped to have a couple of paper routes to feed the need for photons on film.

Long before the days of digital cameras, using film had its own challenges for astrophotography aside from the relative cost. Commercial processing of film was (and is) mostly automated, and with deep sky astrophotography you’re turning in film that’s about 99% black with thousands of pinpoint bright spots. The automated systems tend to freak out and think that you’ve sent them a roll of unexposed film by mistake. I got more than one roll returned to me with that notation attached. So I learned early to do my own black & white processing (if you want it done right, or more importantly, if you want to really screw it up with style…) and to find smaller processing firms that would do “custom” color processing to get it done correctly.

These days you can do amazing things with digital cameras, even more so if you’ve got a decent DSLR like a Canon or a Nikon. To take the really outstanding photos like you see in Astronomy or Sky & Telescope you’ll probably need additional equipment, but there are some truly amazing pictures that you can take with nothing more than some pretty common photography gear that you may already have.

For example, the header photo for this blog was cropped from this picture:

IMG_5371

This picture was taken March 12, 2013 at 19:39 PST using a tripod-mounted Canon Eos Digitial Rebel Xt and a Tamron 70-300 mm zoom lens set at 70mm, manually focused. The exposure was 2.5 seconds at f5.6. The moon was just over one day after new moon and nicely shows the “old moon in the new moon’s arms” effect, with the majority of the lunar surface illuminated by light reflected off of the Earth but the lower limb of the moon much more brightly lit by direct sunlight. To the left of the moon, level with it about six lunar diameters out, you can see Comet Pan-STARRS at nearly it’s brightest for northern hemisphere viewers.

This picture was taken from a spot out in the Arizona desert off of I-10, about 100 miles west of Phoenix. We had planned to stop just before sunset at a rest stop but found the rest stop to be closed (stupid budget cuts!) and ended up just bailing off the interstate at the next exit and finding a spot off of a dirt road a couple miles from the freeway. No fancy equipment, nothing but a tripod, mid-range DSLR, and a mid-range telephoto lens. (And a wary eye for coyotes, rattlesnakes, and other critters.)

The secret to getting this beautiful picture is that this picture isn’t the only picture I took that night. It’s the one really good picture that I’m showing you out of the hundreds and hundreds of pictures that I took that night. DIGITAL PHOTOGRAPHS ARE CHEAP! You need a little bit of experience to know how to get things set up to start (know where and when to look at the sky, make sure your equipment’s in good shape and clean, use a decent tripod, know how to use the non-automatic settings on your camera in order to override the default settings, use manual focus instead of auto-focus, etc) but once that preparation and experience puts you in the ballpark for good photos, take a ton of photos to “bracket” your exposures and settings.

From the time we set up and it started to get dark enough to see the comet, I took multiple series of photos, starting each series at about 1/10 second and increasing the exposure on each through about 15 seconds. The pictures taken at 1/10 second are so underexposed that they’re almost black, barely showing the moon; the pictures taken at 15 seconds are so overexposed and blurred that they’re almost completely white. Each series of pictures has twenty or so pictures in it at 0.10 second, 0.125 sec, 0.167 sec, 0.20 sec, 0.25 sec, 0.33 sec, 0.40 sec, 0.50 sec, 0.60 sec, 0.80 sec, 1.00 sec, 1.30 sec, 1.60 sec, 2.0 sec, 2.5 sec, 3.2 sec, 4.0 sec, 5.0 sec, 6.0 sec, 8.0 sec, 10 sec, 13 sec, 15 sec, and so on. It takes maybe two or three minutes to do a “set” of pictures. Then change the view, change a lens, zoom in, zoom out and take another set. Repeat as necessary or possible, in this case until the moon and comet set.

How did I know that this picture was the one that was really good? At the time I took it, I didn’t know. I knew that I was taking a ton of photos with different combinations and sets of settings and that somewhere in there would be a couple of good ones. Once you get back to your computer and download everything, you can go through the several hundred photos and find the handful that are fit for human consumption

IMG_5358 IMG_5345 IMG_5326 IMG_5268 IMG_5286 IMG_5371

5 Comments

Filed under Astronomy, Photography, Space